
Sharpening with Paper Wheels
-
Some time ago i started sharpening knives with a pair of 8 inch Paper Wheels coming from this company: http://users.ameritech.net/knives/paper.htm after reading about them in the Maintenance, Tinkering & Embellishment subforum on Bladeforums.com.

Until a little over a year i had never even heard about this sharpening system, but the good reviews reeled me in.
Now i already had quite a bit of experience sharpening all kinds of knives as well as scissors professionally with various machines, and i think the Paper Wheels are reasonably priced for what they have to offer, and it's also quite easy to learn how to work with them.
Already the second knife that i ever sharpened with the Paper Wheels became hairwhittling sharp (or level 4 as i call it, the others are level 1: shaving on skin level along the growth, level 2: shaving on skin level against the growth, and level 3: shaving above skinlevel or treetopping)The sharpening wheel is coated with a layer of 180 grit SiC powder which is in turn coated with hard wax, and the polishing wheel isn't coated at all; with the system comes a little white block of white aluminium oxide powder (jewellers rouge) which you hold to the turning wheel for just a second before polishing.
Included is also an amount of wax (which i use very sparingly) and an amount of 180 grit SiC powder, to recoat the sharpening wheel when necessary (normally after dozens of knives)Next to the Paper Wheels you also need a benchgrinder, but you can find these quite cheap at various stores.
I use an old Creusen brand that turns at 3000 rpm.
(In the pictures you can see the machine on the back which is how i use it, the sharpening wheel is on the right and the polishing wheel sits on the left.)


Now many people will think: "sharpening knives on some fast turning wheels, will that not damage the heat treat of my blade ? "
Not with the Paper Wheels, as each wheel has a built in cooling system: the sharpening wheel uses wax which melts from the friction of sharpening, and the polishing wheel uses slits which act like a strong fan and create a stream of cold air.
Both ways help to keep the edge temperature below critical limits.
Another thing while sharpening & polishing is to make deliberate and continuous passes starting near the ricasso of the blade and to proceed until the tip of the blade is in the center of the wheel surface: then take the tip off of the wheel.
Do not let the tip slip of the wheel surface or you will round it.
Another thing: In spite of the cooling systems; If you work too slow or stay in one place too long the edge will still get hotter quickly, so avoid that.Also good to know is that the industrial strength cardboard from which the wheels are made has a minute amount of "give" during sharpening, as they are not solid like stone wheels.
This will in effect create an ever so slight convexing of your new edge, something that you can vary more or less by applying more or less pressure during sharpening.I have been working with the Paper Wheels for several months now, and this is my resume;
Plus:
- The speed.
In most cases (with normally blunted edges without deep nicks) you will have a new edge on your knife in no time.
A standard 10 inch kitchen knife can be done in about 10 minutes flat.
(I personally take my time for the polishing process because i want my edges to look good also, but it can be done fast as well.) - The system excels in beautifully polished narrow edges
Minus:
- For serious reprofiling and/or removing deep nicks use a belt grinder or coarse diamond stones, as for this the 180 grit SiC powder isn't coarse enough.
- On both wheels staying too long in one place can gouge the steel on your blade.
I can't stress this enough: when sharpening and/or polishing: use a deliberate and continuous movement.
For me this works best by (while standing); "freezing" my arms and upper body and make the turn from my waist, as if you were a machine. - The speed.
-
Fantastic post, thanks so much for the info.
 I'm going to try it out and see what I can do. Maybe I can sharpen my Douk-Douk with it!

-
Fascinating stuff mate
-
Thanks for the informative writeup and pics, kwakster. Looks like you get great results with this system.
"Leave the Stone Age Behind" - great slogan!
I'd be afraid of burning the temper out of my blades.
Plus, I doubt if I could hold to a constant angle while moving the blade across the wheel.
An idiot proof system like the Lansky is better for me. ;>
.
-
Back from the dead.....
You really have to not pay attention to detemper your blades with the wheels. I've sharpened a few knives where the edges were really acute. After about 2-3 passes per side the edges were still nowhere near hot enough to detemper them. I agree with Kwakster in that serious re-profiling should be done on another device. All in all I can't get over the results I get with the wheels. After sharpening my Boker Trance on the wheels I used it to cut up about 10-15 cardboard boxes. It still shaves hair, though it really snags it more than shaves it. Still, that's better than any edge I got before using the wheels, and that's with AUS8 steel. Kwakster, have you contacted Richard J over at Bladeforums for any tips/tricks/etc?
-
No, i haven't contacted Richard J from Bladeforums; i don't feel the need since i've already read the complete Paper Wheels thread there and i'm already quite satisfied with the edges i get from my set of Wheels; practically every edge created on the wheels can whittle hair and looks good as well.
Besides sharpening my own knives with the Wheels i also sharpen knives for a few chefs & restaurants in my hometown, and the feedback i get on those polished Paper Wheels edges is without exception very good.
Especially for knives which do almost all of the cutting on wooden or polypropylene boards the edge needs to be as strong as possible, and polishing really helps with that.
Only on one or two smaller knives some chefs want a coarser edge since that will cut stringy stuff better than a polished one. -
Anyone still using this system? I'm thinking of giving it a serious try now.
Do you think this system will work for SAK's? -
Amici,
I just had a fellow sharpen a Camillus USAF Pilots knife with a V edge using paper wheels that I recently acquired. Now is not only razor sharp, but is also easy to touch up using a ceramic rod compared to the abomination of an edge that these knives would leave the factory with.Cheers,
Serge
-
This is my vintage Puma 6383 Buddy from 1972 as it was before sharpening.
The factory edge was very obtuse and couldn't cut anything well.


Specs:
Overall length: 9.6 inch (24,3 cm)
Blade length: 4.8 inch (12,2 cm)
Blade thickness: 3,1 mm
Steel: New Stainless Super Keen Cutting Steel
Hardness: 57-59 HRC
Handle material: Sambar StagThis is the knife after sharpening on my set of Paper Wheels.
On this edge burr removal & semi-polishing was still done with the use of white aluminium oxide, nowadays i use diamond paste instead.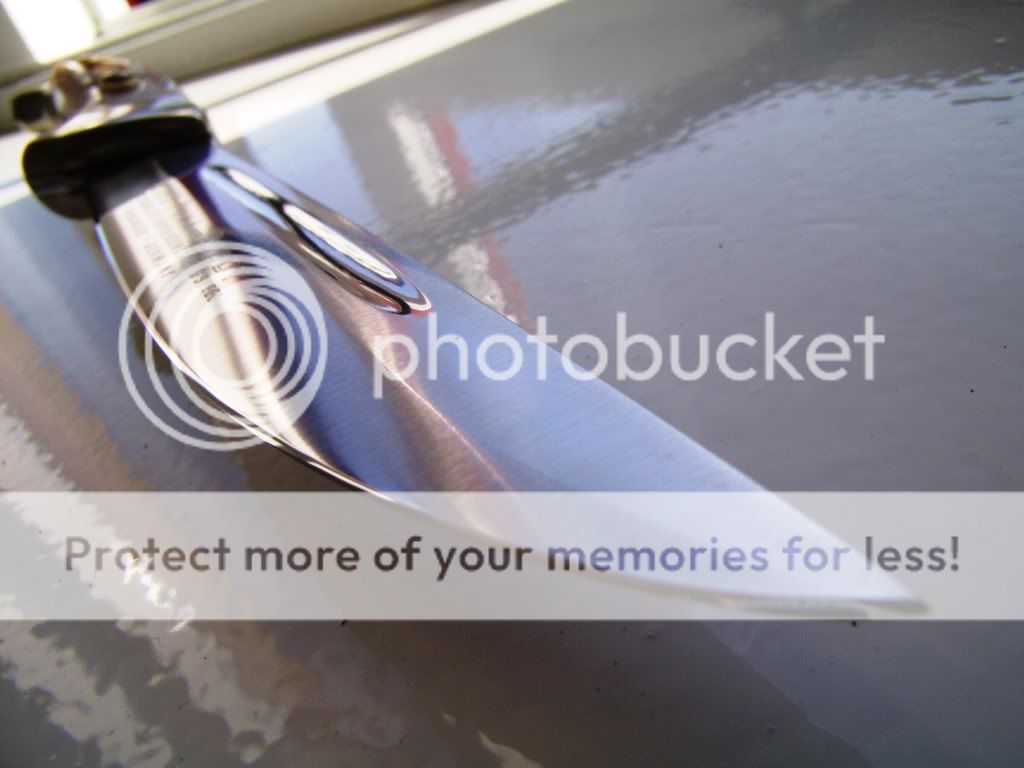


-
Since i started working with Paper Wheels back in 2009 i've experimented with quite a few regritting methods, and the recipe below is what has been working best & longest for me:
1 - First remove all traces of the old wax layer.
For this i use a steel wire brush on the spinning Wheel until most is gone, then i shut the machine down and remove the last remnants with an old rag & brake cleaner.2 - Then remove all traces of grit & glue until you get to the bare cardboard surface.
For this i use an old coarse silicon carbide stone first and a semi-coarse diamond stone second, but coarse sandpaper on a piece of wood also works well.3 - Take a good quality water resistant wood glue and coat the bare cardboard surface evenly.
I just use a clean finger while turning the Wheel with my other hand.
Let dry at least overnight.4 - The next day apply a new and just a little thicker layer of the same glue, and immediately after coat the surface with the grit.
For this i put a thick layer of grit in a small rectangle box or a deep plastic lid from a jar and gently push the surface of the wheel in it, evenly and all the way around.
Put the wheel back on the machine and let dry at least overnight.5 - The next day run the machine with the wheel for just a few seconds so any loose grit particles fly off.
I also hold my diamond stone shortly to the sides of the Wheel to remove grit particles that stick out there.
Stop the wheel and coat the gritted surface with a very thin & even layer of the same wood glue, so thin you can still feel the grit under your fingertips when you're done.
Let it dry at least overnight.6 - The next day run the machine and hold an old junk knife a few seconds to the wheel (still without the wax), as this will lay bare the highest points of the grit particles.
Now you can put some wax on the surface (don't overdo it) and sharpen away.As you can see the process takes some time, but to me it's worth it.
The triple layer of glue makes for a much stronger bond of the SiC grit to the cardboard surface compared to just one layer of glue, and each grit particle is also held better in the glue since it's almost completely encapsulated by it, while the glue itself will wear away easily during sharpening.
This method provides me with a grit Wheel that works perfectly and also lasts longer between regrittings. -
Thaz's quite a process. Thanks for a step by step guide. Your sharpening jobs are always amazing.

-
@kwakster said:
This is my vintage Puma 6383 Buddy from 1972 as it was before sharpening.
The factory edge was very obtuse and couldn't cut anything well.
Specs:
Overall length: 9.6 inch (24,3 cm)
Blade length: 4.8 inch (12,2 cm)
Blade thickness: 3,1 mm
Steel: New Stainless Super Keen Cutting Steel
Hardness: 57-59 HRC
Handle material: Sambar StagGreat post and the knife is gorgeous!!!!
-
Spyderco Southard with CTS-204P blade, which has been in use for a few years now with a Dutch scout leader.
It has already been sharpened several times by him on stones, plus two times by me on Paper Wheels (once up to 6 micron diamond compound, and once up to 15 micron diamond, the latter performing noticeably longer for the owner)This time the knife was reprofiled from about 30 degrees inclusive to 25 degrees inclusive with a standard Paper Wheel with 220 grit SiC, then deburred with a second Paper Wheel with 0.25 micron diamond compound.
This produces a polished semi-coarse edge with an aggressive bite, as the knife is going to be used to cut a lot of 10 mm polyprop rope in the coming weeks.
You can click the pics 2 x for a bit more detail.


-
A Strider SMF with S110V blade from a Dutch forum member.
According to my Tormek angle gauge the old edge measured +/- 40 degrees inclusive from the heel to half an inch before the tip where it changed into 45 degrees inclusive.
The owner uses this knife mostly to cut various kinds of green wood & twigs in horticulture, and had already tried his hand at reprofiling the edge himself with a DMT Diafold.
Together we came to the conclusion that the edge could do with a full reprofiling, as well as with a finer edge finish to better suit his specific purposes.
BTW: the owner also contacted Duane Dwyer by mail, among other things to ask him about the hardness of this S110V blade, and according to Duane it measures 61 HRC.This was the knife before sharpening:


After reprofiling & sharpening.
The new edge angle came out at +/- 32 degrees inclusive along the entire edge, and it can treetop armhair and slice single ply toilet paper.
Probably due to having the flu at the moment my hands didn't do exactly what i wanted them to do, and as a result i didn't manage to get both bevels completely symmetrical.
Grit progression: a Paper Wheel with 220 grit SiC for reprofiling, a second Paper Wheel with 15 micron diamond compound for refining, and a third Paper Wheel with 0.25 micron diamond compound for removing the tiny burr.


-
The factory edge of this Spyderco PM2 in S110V steel was barely shaving armhair on skinlevel, and according to my Tormek WM200 the edge angle was near 35 degrees inclusive.
The old apex was removed by cutting several times straight into a silicon carbide stone, and then i used 4 different Paper Wheels coated with diamond compounds (15, 6, 3, and 1 micron) to create & refine the new edge.
Normally i don't take high carbide steel types this far, but in this case i wanted to see how the S110V steel would do.The new & ever so slightly convex edge measures a hair below 30 degrees inclusive, and can easily whittle a normal chest hair towards the point along the entire edge.
Thinner ones will sever immediately upon touching.
My cheap camera is not really able to show full details, but at least it gives some impression.



Hello! It looks like you're interested in this conversation, but you don't have an account yet.
Getting fed up of having to scroll through the same posts each visit? When you register for an account, you'll always come back to exactly where you were before, and choose to be notified of new replies (either via email, or push notification). You'll also be able to save bookmarks and upvote posts to show your appreciation to other community members.
With your input, this post could be even better 💗
Register Login


