
Ti-yeoman in the works.
-
I'm looking forward to a lot of high-res drool worthy pics :D
-
@tattoosteve99 said:
How do you plan to put three back tools on? I see that 2 backsprings already have the cutout, but the mag glass/ inline has no such place. Do you plan to make a backspring or change the existing one? Still looking forward to this mod. Titanium
Pay no attention to the awl. I don't know how that got in there.
 You know how they like to get awl up in the mix.
-
@ironraven said:
This project makes me feel all warm and squirmy and perky. SAKporn at it's finest.Wow, that makes me feel a little squeamish, unless you're a chick, in which case, you're welcome. ;)
-
And I thought the DeluxTinker was amazing (not saying it's not)!! This one will be even better!!
I really need to save some money for one of this, hopefully before I die I'll have one of this :ahhh! BTW have you finished the DeluxTinker, the makers mark and all?
Great job as always, take care!!
-
How do you plan to put three back tools on? I see that 2 backsprings already have the cutout, but the mag glass/ inline has no such place. Do you plan to make a backspring or change the existing one? Still looking forward to this mod. Titanium
Pay no attention to the awl. I don't know how that got in there.
You know how they like to get awl up in the mix. gotcha. Those reamers are kinda pesky. Maybe you could put one in like the alox version.
-
@WWW said:
And I thought the DeluxTinker was amazing (not saying it's not)!! This one will be even better!! I really need to save some money for one of this, hopefully before I die I'll have one of this :ahhh! BTW have you finished the DeluxTinker, the makers mark and all?
Great job as always, take care!!
I was planing to epoxy mask the mark in reverse and have it bead blasted on there but had trouble finding someone to do the blasting. The guy that bought it said he liked it unmarked so it ships off to him next week. This one gets an ishimi texture so I'll polish the whole thing beforehand and leave the mark untextured. It costs a ridiculous $95 to have the mark deep laser engraved instead of that obvious laser burn looking etch because it takes serious laserpower to handle polished titanium.
-
This project makes me feel all warm and squirmy and perky. SAKporn at it's finest.
Wow, that makes me feel a little squeamish, unless you're a chick, in which case, you're welcome. ;)
With a beard and mustache this proud, I should hope not. passes the bucket
:D >:D

-
This project makes me feel all warm and squirmy and perky. SAKporn at it's finest.
Wow, that makes me feel a little squeamish, unless you're a chick, in which case, you're welcome. ;)
With a beard and mustache this proud, I should hope not. passes the bucket
:D >:D
My lady is relieved.
-
That sounds very cool, T-6 is useful for so many things these days.
@Neil said:
I'd be very interested to see what you do with the magnifier.Me Too! Never cared for the plastic housings. I always though it took something away from the Explorer, and other models with the Mag, even more so than Cellidor scales since the plastic sits in the tool layers. It did function fine, but just does not look right.

-
@Neil said:
I'd be very interested to see what you do with the magnifier.I sanded the snot out of it. It had plastic washers molded in so I ran it across a belt sander to turn it into a nice flat template. I won't pretend that I took no pleasure in it. >:D The inline Phillips now becomes the standard for the width of this layer and it's .110" so I choose a piece of .063" titanium for a two layer bezel which gives me a bit of extra thickness to sand away scribe marks and center punch errors. The plastic template gets epoxied to the ti and the outline is scribed and the pivot hole drilled before it's flipped over for another piece.

Next both parts get cut out of the sheet with, amazingly, only 2 saw blades. Still can't figure out why 1/8" ti takes 10 times longer to cut than 1/16" ti. They get epoxied together and sanded and filed to shape. The second pivot hole and the rivet holes are drilled while the parts are stuck together to ensure that they line up perfectly.

One piece gets the glass hole cut out and drum sanded to very close to the final diameter. Once that's done the second piece gets lined up to it using pins in the rivet holes and I scribe the line for the hole in the second piece. Both pieces will get epoxied back together and the lens holes honed out to the proper diameter simultaneously.

It doesn't look like much but this is the 10x mineral glass lens from a once nice Bausch & Lomb jewelers loupe that just happens to be .110" thick. It costs about $40 new but the time saved not trying to find a perfect lens of just the right thickness makes using it worth while and I have quite a collection of loupes so it won't be missed. Actually it's perfect for this application because the optical glass this lens is ground from has a higher refractory index than most lenses which means it can be higher power magnification and still stay relatively thin. I'm not the least bit concerned that it's waaay bigger than the bezel. I can't change the thickness but I have lapidary tools to deal with the diameter.

-
This is sounding (and looking) like a fantastic project.
-
The mad man is at it again, and the cutting has started.... we'll just make that fit like so... :ahhh
-
After grinding the lens down I noticed a tiny scratch right in the center. It was enough to make me think a new lens was in order so I have an 18mm double convex lens with some sort of fancy anti-reflective coating and a tube of optical adhesive coming from Edmund Optics in a few weeks. In the mean time I've done what I can with the bezel for now. I need the lens to know how to cut the bezel halves for mounting. So I turn my attention to the scales and liners.
Here's yet another set of parts that I'm looking forward to having water cut from now on.

-
This is looking amazing (as was your last one :)
Is this one going to have the same hi polished finish ... or a brushed finish ?
also i should ask ....how long is your waiting list for these works of art ? (and where do I sign up :)
one more question ... do you think your plan for ti-alox will be realized in the near-ish future ?
I think my perfect model would be a ti-alox soldier with scissors and a philips screwdriver replacing the awl in a scale cut out (like the prototype alox soldier from the late 50's)
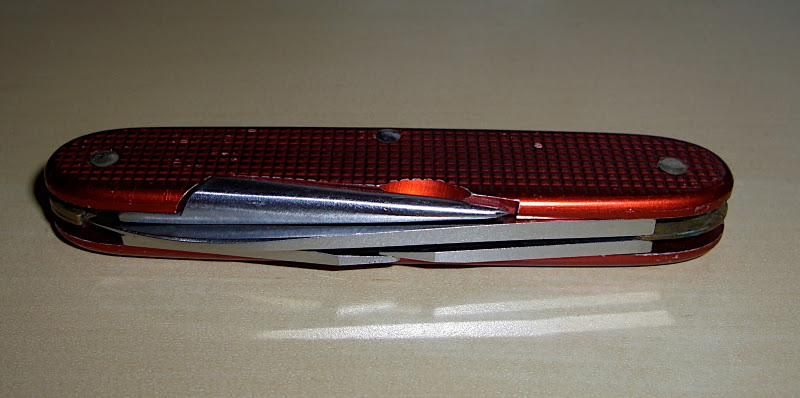
or maybe a corkscrew :)
and naturally a 1966 blade :)
-
@jaydar said:
This is looking amazing (as was your last one :)Is this one going to have the same hi polished finish ... or a brushed finish ?
also i should ask ....how long is your waiting list for these works of art ? (and where do I sign up :)
one more question ... do you think your plan for ti-alox will be realized in the near-ish future ?
I think my perfect model would be a ti-alox soldier with scissors and a philips screwdriver replacing the awl in a scale cut out (like the prototype alox soldier from the late 50's)
or maybe a corkscrew :)
and naturally a 1966 blade :)
This one gets the ishimi texture. I was eager to do something really kind of show-offish for the next one to build up a reputation and get some more business going but needed to know it would sell for enough to get some ti watercut. Along came the guy that asked for this one and he had perfect timing because I'll charge nearly twice as much to do one like this again.
I have 3 other commission knives going right now which isn't much except that I'm still cutting everything by hand. Not much of a backlog but you should PM me. My prices are pretty good and they'll only go up when I don't need money so badly for the work I want to outsource. Once I have a box of precut scales and liners I can focus on finishing and polishing and assembling which is the fun part for me. Cutting 1/8" titanium scaled by hand is just tedious.
The first Tilox will actually be a brasslox. It was commissioned by someone that has a taste for brass edc items and I'll be using phosphor bronze for the liners because it's the spring tempered titanium of the copper alloys. It's a massive 5 layer with scissors, pliers, saw, blade and awl and I figured out that a spacer next to the cap lifter would open that layer up enough to get a inline phillips into that layer for a phillips/standard screwdriver with no scale cutout needed. That one will be a work in progress thread too. -
Sorry, link no worky. Here it is. http://edcforums.com/showthread.php/79693-Ishimi-metal-texturing
-
Just an update (mostly for the buyer), I received the lens and it is beautiful. I went out on a mildly sunny day and lit a cigarette with it so yeah, it'll do that. I realized that at just a hair over 20mm the two piece bezel is going to be a bit small not leaving enough material around the edges to make me comfortable with it's strength so I'm waiting for another order, a gross of coarse saw blades to cut a new one piece bezel from the same beastly thick 1/8" titanium that the scales will be cut from. In the mean time I turn my attention again to the liners and scales, as well as a Ti-Rambler with tritium vials...
-
Wow... please sire can we have some more? :D





Hello! It looks like you're interested in this conversation, but you don't have an account yet.
Getting fed up of having to scroll through the same posts each visit? When you register for an account, you'll always come back to exactly where you were before, and choose to be notified of new replies (either via email, or push notification). You'll also be able to save bookmarks and upvote posts to show your appreciation to other community members.
With your input, this post could be even better 💗
Register Login


