
Tofty's Custom Brass Torches
-
Stunning work mate

-
I love it, very 'Steampunk'. 8)
-
Right then, this is the 'process of making' section for the central section of the torch. There arn't too many pictures as i kept forgetting to take any at important points so if it all gets too unclear ask and i'll take some more photos of anything specific.
Knurling.
This is the very first process undertaken as it is the most likely to fail.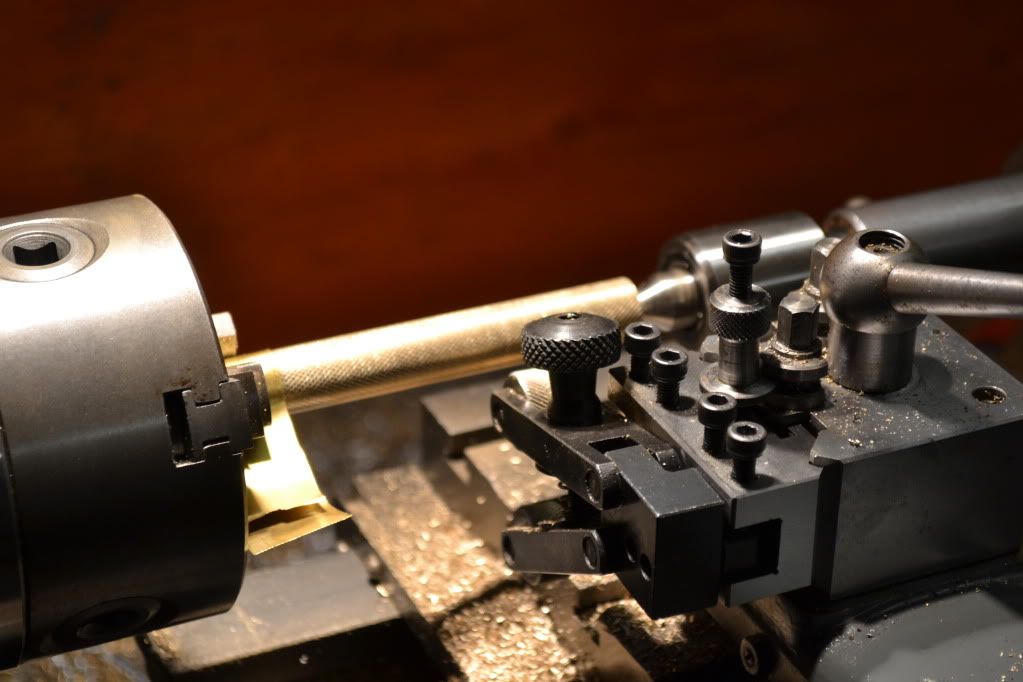
A knurling tool like the one in the picture is essential as it reduces lateral forces applied to the lathe spinal while forming. Getting the knurling to line up on the work piece can be very time consuming;
The cutting wheels each have one half of the knurl pattern, and the wheels have a fixed diameter so the work piece has to be of a coresponding diameter that allows the pattern on the wheels to drop into the already cut paths on the work is it rotates.
There are calculations to work out what the work diameter could be if you know the cutting wheel diameter and pattern distance, however it's usualy easier just to make a light cutting pass along the work, check alignment and then take off a light skim from the surface leaving a smooth surface and trying again.
I started with 16mm diameter brass rod and had to turn it down to 15.8mm before the knurling cut well.
Sometimes it works first time, it all depends on the diameter and how lucky you are.Cutting the rings.
This is one of the easiest processes and i just did it by eye.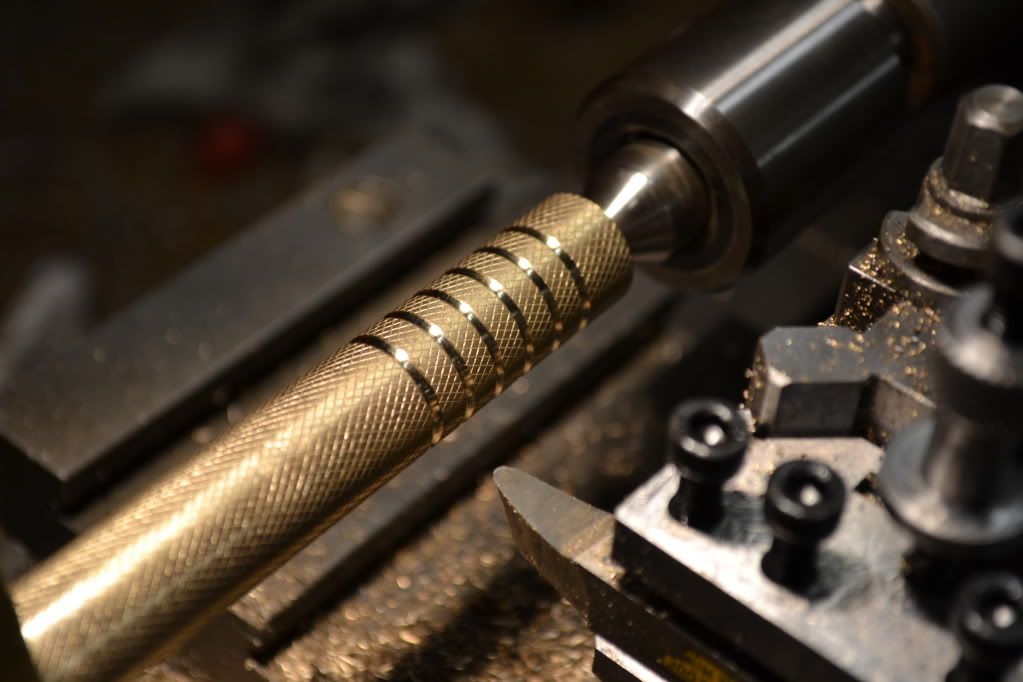
I start by setting the distance i want the rings from one end on my calipers then use them to scratch a ring on the work while it's spinning.
Then i use the radiusing tool and bring it into the work until i'm satisfied with the result, i make a note of the depth of cut on the cross slide then repeat the process.Boring.
This should be done after knurling and other cutting process if possible due to the fact that the bored out tube of metal will flex more if pushed laterally.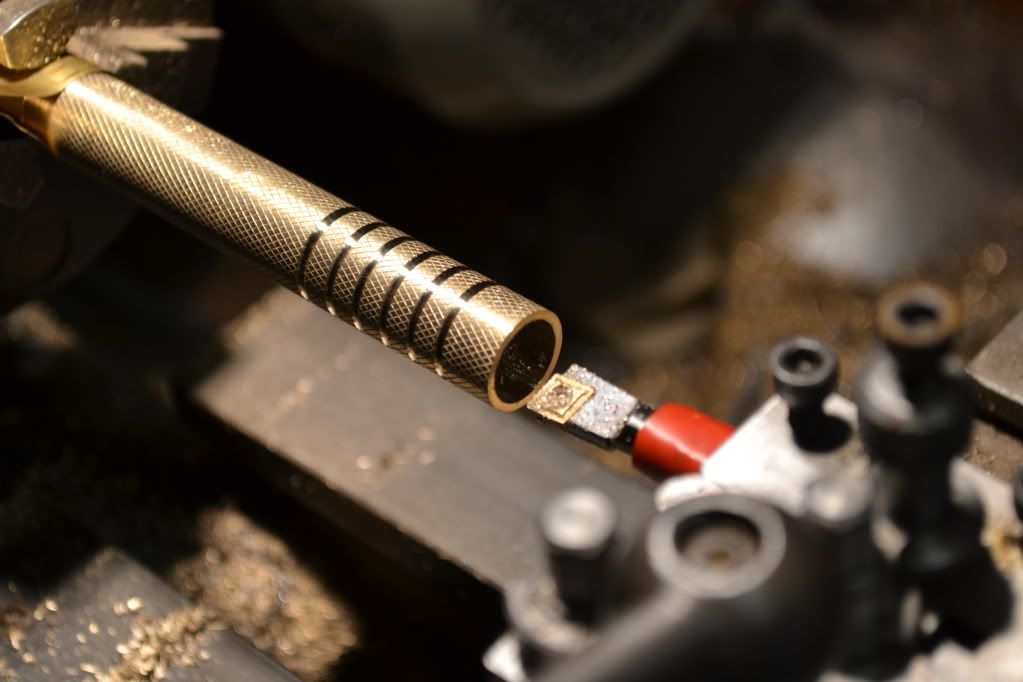
I always drill as much as possible before using the boring tool for two reasons:
- Because drilling does not place a lateral force on the work,
- the boring tool won't fit in a hole smaller than 12mm diameter.
The central bore is only 11mm so can just be drilled to that size but the end flair needed to be wider so i drilled that section out to 12.7mm diameter (the biggest drill bit the chuck can take) the finish off very gently with the boring tool.
Tapping.
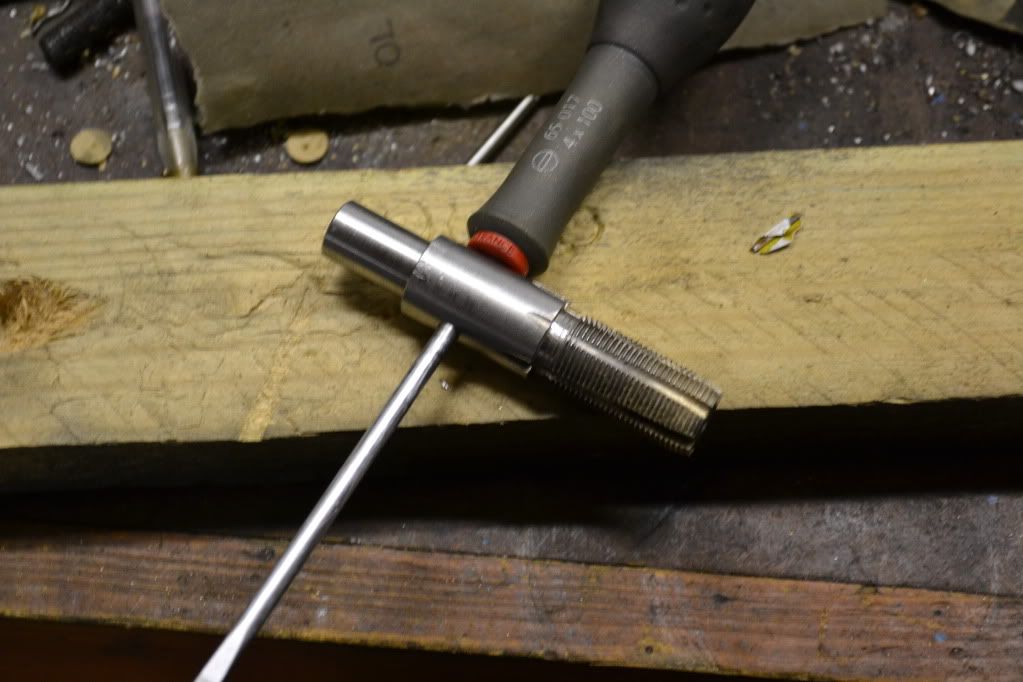
I could have used an internal thread cutting tool but i don't like to so i made a tap out of some scrap steel, it's not hardened as brass is still relatively soft.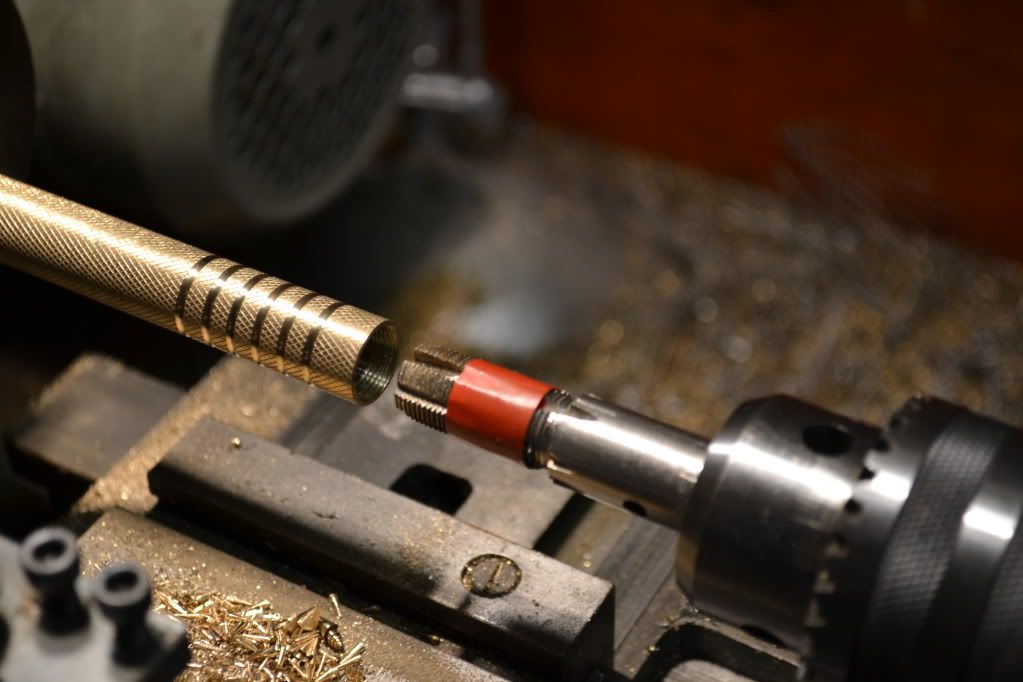
The chuck the tap is mounted in is a tapping guide tool; it has a shaft in the back which slides into a tube behind it which allows it to move forward and back freely while keeping correct orientation with the work. With a tap this size it requires alot of torque to cut deep which cant be easily provided while on the guide tool.
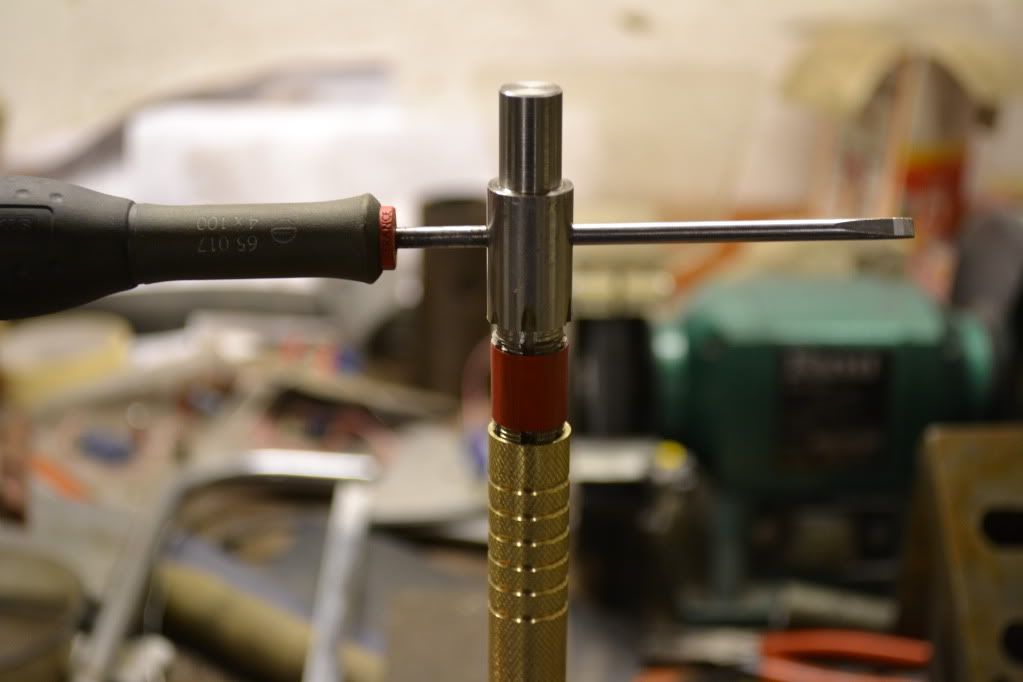
Once a few turns are made the tap will stay true and brute force can be used to finish up.
Cutting the o-ring channels.
This is a simple process but requires a close eye on tolerances as oversized channels render o-rings less useful and the channels are the thinnest part of the torch body so an overly deep cut can ruin the work piece entirely by going right through it.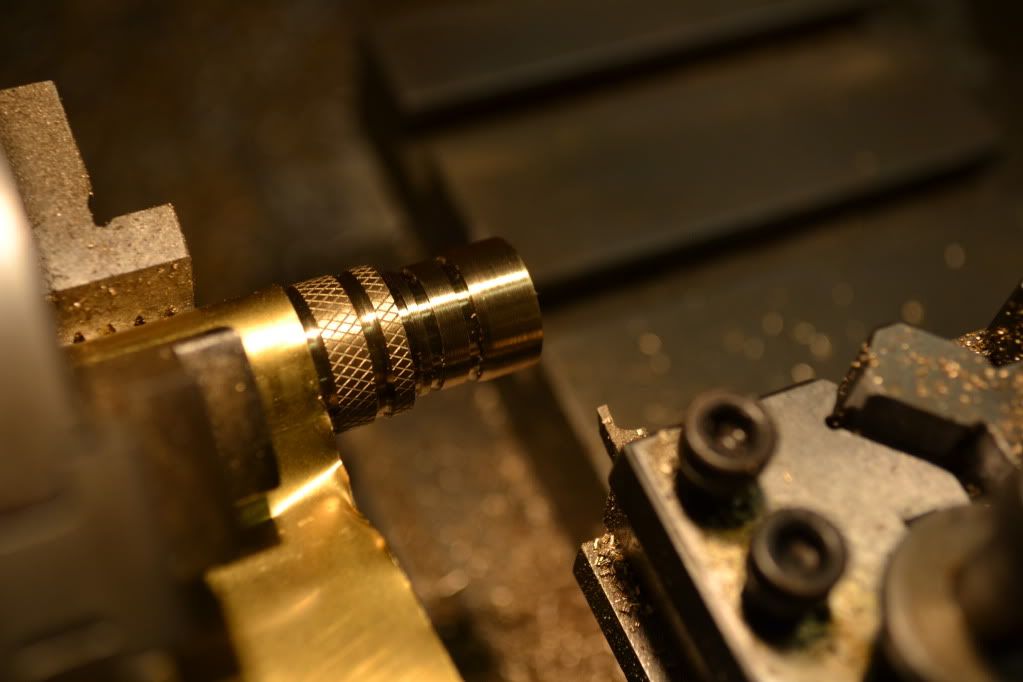
External threading.
For small threads a die can be used on a lathe using a die guide which is similar to the tap guide and mounts in the tail stoke but for larger threads it's best to cut them with the lathe.
I forgot to take any photos of this but there's not much to see anyway.
It's all a matter of getting the lead screw (which drives the tool post forward and backwards) to move at the correct speed relative to the spinal speed, this is done by connecting the two devices with a complex arrangement of gears.
Using the gear combinations almost any TPI or thread pitch can be cut with a fine pionted 60 degree cutting bit. Always turn slowly and take shallow cuts, sometimes even making several passes at the same depth.Parting.
Cutting off the work piece from the larger stock is done with a thin cutting tool and is a real pain on harder metals. Luckily brass is really easy so it only takes a moment. Copper on the other hand is terrible as it melts when cut, flowing behind the blade and causing it to jam, making an awful mess.Cutting the flats on the body.
With the right tools this job was really easy which suprised me a bit as i wasn't looking forward to it at all.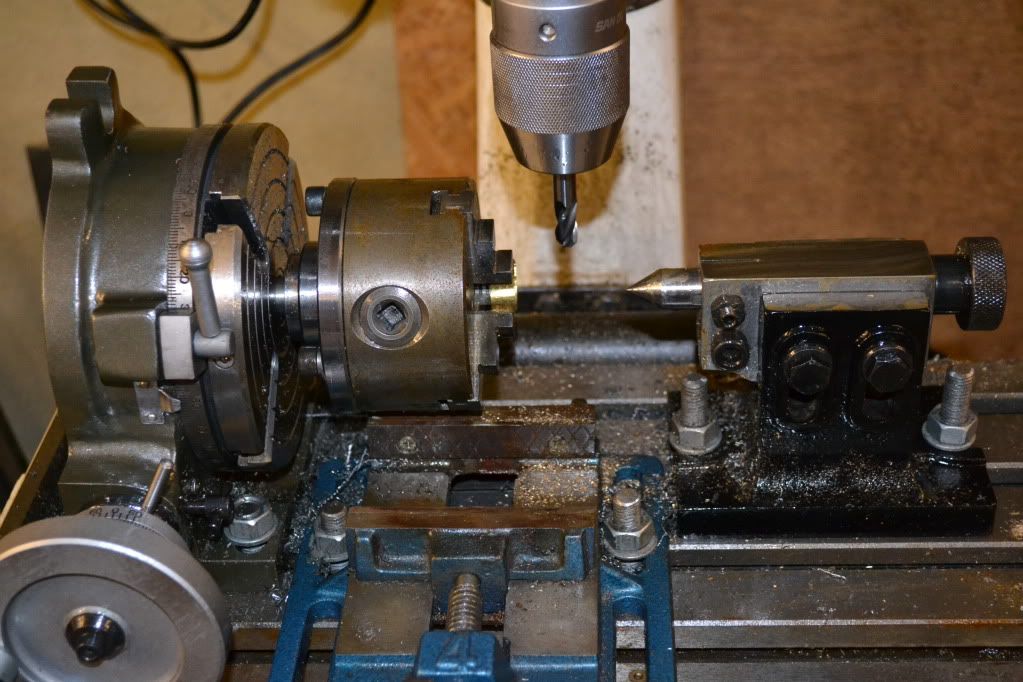
My new rotating table and tail centre allow accurate cuts that are unachievable without it.
Before i was using a v block to hold rod and if i wanted to cut holes around the rod i had to release it, turn it manually and try and realign it by eye which wouldn't be accurate to 5 degrees.
the 45 degree edged slot mill is another great tool which cuts the nice slopes on the edge of the flats.I'm not sure how clear or even interesting all that is so here are some crisper pictures of the finished torch:
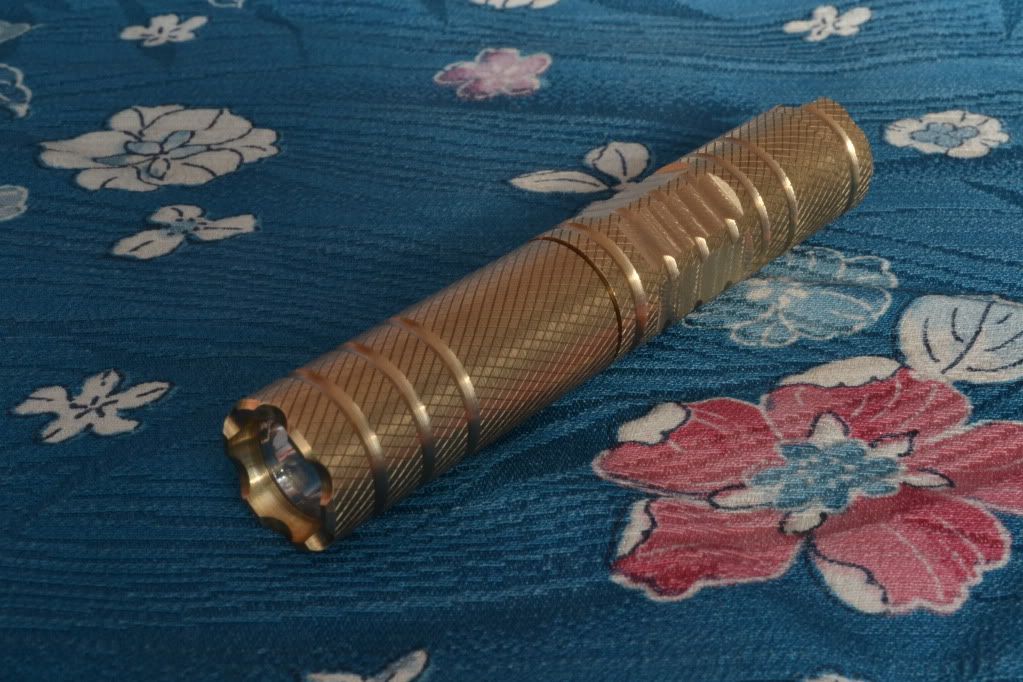
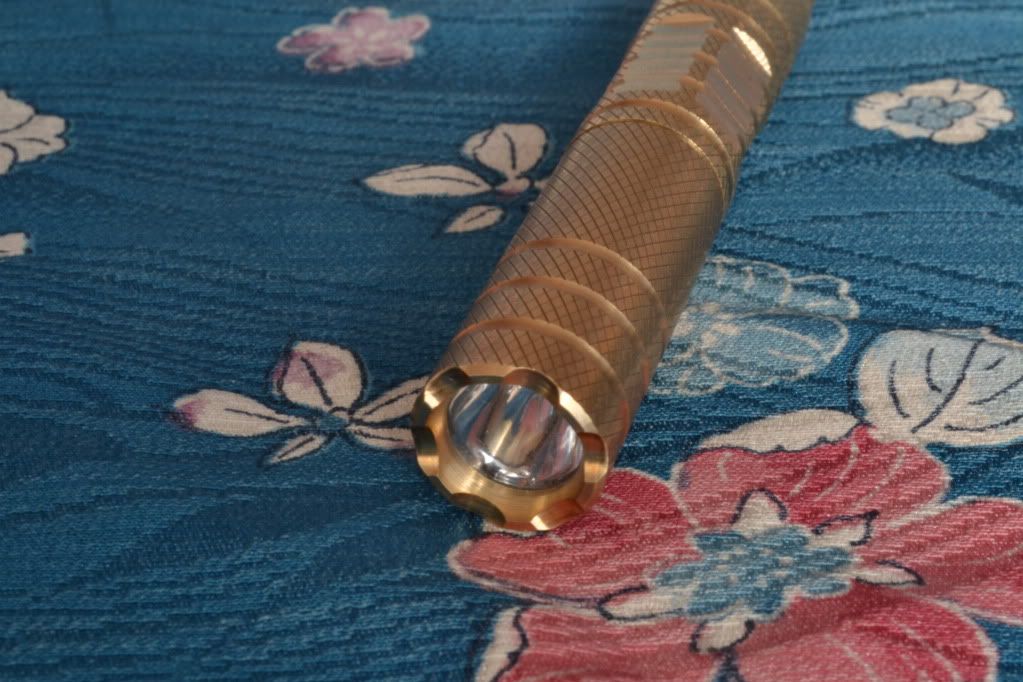
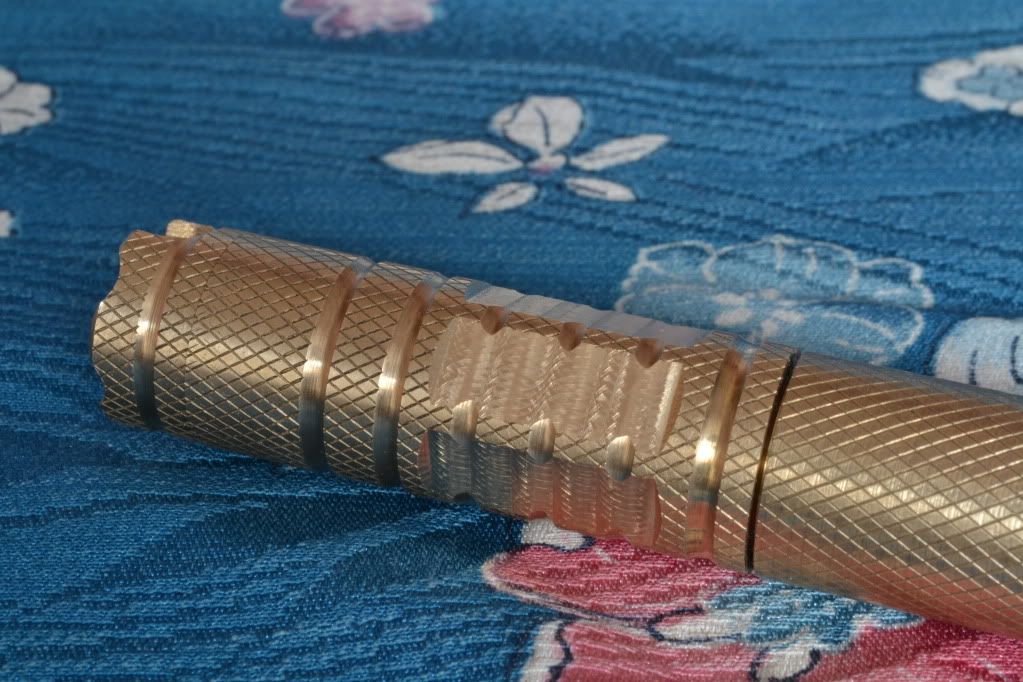
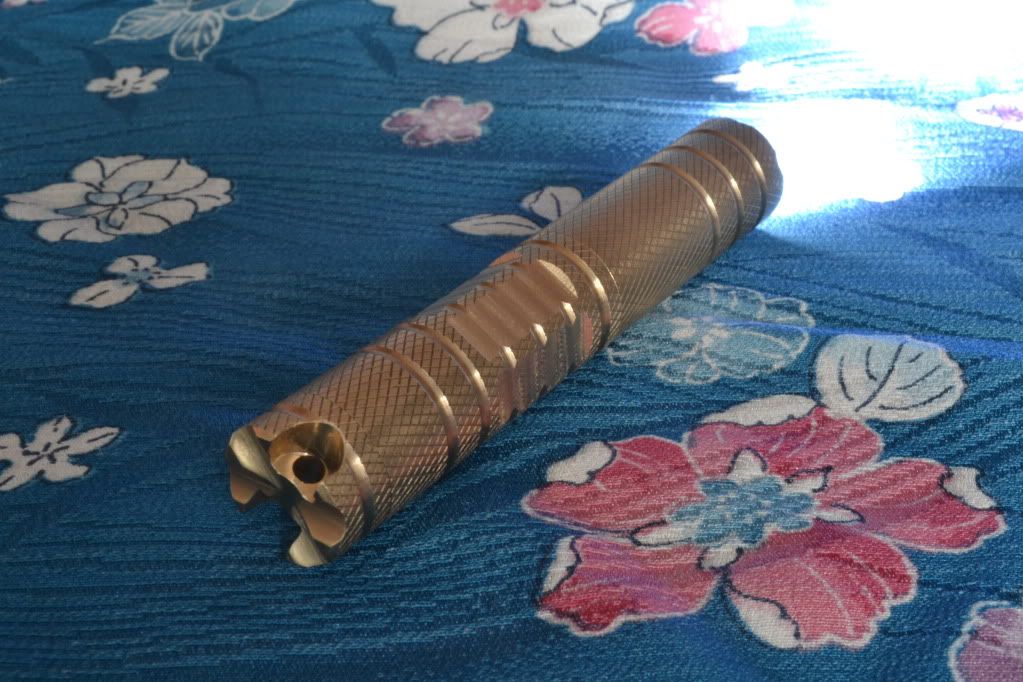
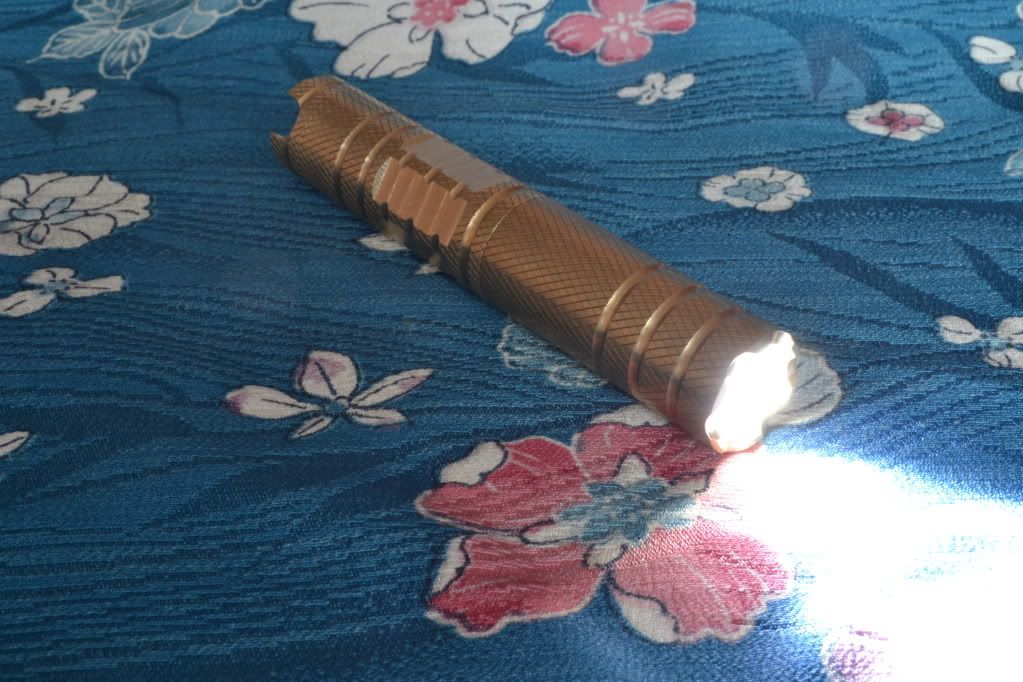
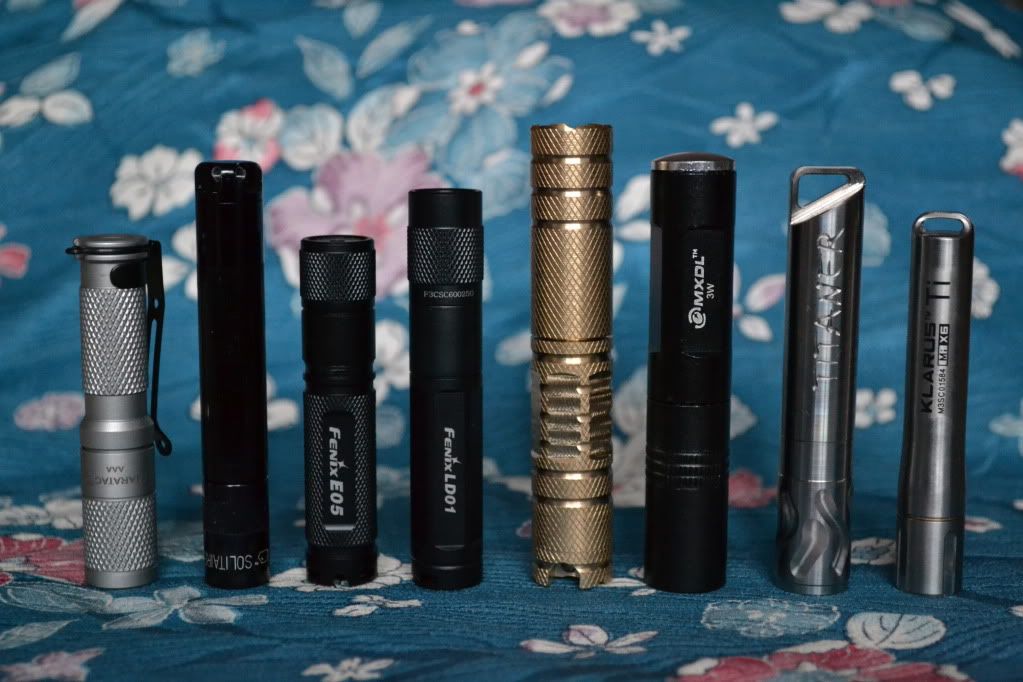
When compaired to other AAA keychain torches it's really shown up as to how large it is.
When peak make their torches available to everyone i look forward to getting hold of one of their brass eiger models (probably the qtc version) which looks much better and would still be cheaper alternative were i to sell these, which i won't as it's not worth it.Looks alright though.
-
A short while ago i was thinking about the brass torch and just how long it had taken to make. I then thought about all the ways in which it's manufacture could be simplified by removing some of the cosmetic features and redundant design.
I then went into the workshop and with a few bits of scrap brass from the previous built i was able to knock this up in an evening:


By removing the knurling and not having a seperate end cap not only was it quicker to make but is smaller and lighter than the original torch.
I think i'll have another go at the lanyard hole design and then perhaps a give-away might surface.
-
I think I might even prefer the look of MkII, the triangular end especially looks great IMO.

-
Time for Mark III,
slightly different tail arrangement that allows an attached split ring to lie flat when tail standing.


Check out the General Tool Discussion Forum for a chance to win this torch.
-
@sparky415 said:
That's beautiful Tofty
+1
-
Amazing craftmanship Tofty..
-
I said so in the other thread, but I'll say it again here: Outstanding machine work there sir!
You've really outdone yourself yet again. Congrats on a stunning torch, and thanks for the generous giveaway! A question though (perhaps already discussed previously in this thread..?) What will you do to prevent the brass from tarnishing? I love the shiny gold color of freshly cut brass, but after just a bit of handling, it always turns a dull dark brown. :( The only thing that I've tried that seems to prevent this is a coat or two of clear enamel spray paint, but the downside there is that the paint doesn't seem very robust, and tends to come off with rough handling, thereby exposing the raw brass again.
 Have you had any better luck than me?
-
I hadn't really considered any way of keeping brass from tarnishing, in fact it's the fact that it does tarnish in the way that it does that attracts me to it.
In 50 years this torch might look weathered, stained, tarnished and corroded but will still be in as good a working order as when it was made (ignoring the inevitable failure of the led).
I like the fact that it Looks used.
If i want a material that will not change over time i would go for stainless or titanium, or if i really want to spend money i could try and source some of the more corrosion resistant bronze alloys like alu-bronze.I wouldn't consider coating items because as you say the coating is not durable enough and it will wear unevenly exposing bare metal in patches leading to an uglier surface than natural tarnishing.
Another reason why i haven't considered surface protection is that whenever i feel i want to clean something up i can clamp it in the lathe and spin it up with some brasso, takes a couple of minutes.
Not really a useful solution for most people but there you go.





Hello! It looks like you're interested in this conversation, but you don't have an account yet.
Getting fed up of having to scroll through the same posts each visit? When you register for an account, you'll always come back to exactly where you were before, and choose to be notified of new replies (either via email, or push notification). You'll also be able to save bookmarks and upvote posts to show your appreciation to other community members.
With your input, this post could be even better 💗
Register Login


