
Wanted: Detailed Diagram of the 91mm Plus Scales
-
Now I haven't used tung oil in ages.

Guess the Tung oil application is going to take days, or a week. :ahhh
-
Read an interesting article on oil finishes, and how various finished came about, were blended, other forms that came into play, and label trickery. Oil Finishes: Their History and Use
It is a very good read.

-
Scales look good to go. Had a few minor finishing repairs, mostly to the sidewall of the mounting hole that lies between the toothpick & pen grooves. Applied two thin coats of epoxy thinned down with rubbing alcohol to seal the wood. Removed the epoxy from the mounting holes before it fully cured.
Hoping I can get an equal amount of epoxy mix to mount the scales on. Which color/half of the epoxy should get the most of, since they do not always come out equally: white or the colored-yellow gel? Doesn't say which one is the hardener. Don't want a runny mix. :ahhh
In the past, many many years ago, had mixed a tad more hardener to get a firmer grip. So do not like mixing as if not enough of one or the other then it never hardens. Should of looked elsewhere and picked up separate tubes instead of a syringe container.
Should I epoxy the scales on first, or does it matter if I oil them up before application? Reason why I ask is the first coat of oil is suggested to keep applying till the wood soaks up all it can hold. Then buff out the risen wood particles and dried finish before applying a second coat. Was told this could take up to five subsequent thin coats to get the maximum benefit from the Tung oil.

-
Both sets 1 & 3 are ready for the finishing process. First set on the Spartan is at 4mm, 3rd set on the Climber at 6mm. :D
Corkscrew side

Awl side

Edit: The texture on my very first set looks terrific! Am anxious to see how the Tung oil will look on them. :D
-
In the dunny (great place to multitask at) looking at the transparent blue sapphire scales of my Climber, and how I had abused them in such a short time. Looked at the plain scale and noticed that Victorinox had polished their name on the inside, left most everything else dulled down.
Looked at a recess of a possible button area, a + area, and then a tiny bit of shiny caught the light. Pulled out the short blade, and looky at what I got!
Looks like I get to add a small metal Victorinox shield logo in my knife handle now. :D

Too bad it is so thin. Thought it might make for a neat wood burning emblem maker. Only soldering iron I have is a portable butane one with a catalyst chamber. A Rat Shack version.

So I got a little surprise this evening. The one time wishing I had a small exact-o knife set.

-
Sharpened up the Leatherman Squirt blade. Centered the logo width wise, eyeballed the position. Holding it down with a finger, traced a light pencil line around it. Carved the area down some. Sanded in the middle somewhat. Checked the fitting again.
Mixed up some epoxy, and put it in the recessed cavity. Set the logo inside, then added just a thin layer of more epoxy. Checked it again to be sure not sticking up anywhere. Pressed down on major points with a straight pin.
Looks good. Letting it dry. Tung oil will saturate behind the wood, so should still be good there. This is going to be one sexy SAK scale! :D
Edit: After the epoxy set to a hold state, yet still flexible, went and trimmed off the excess epoxy with a small knife. Sanded the area around the epoxy setting. Might of set it in a tad deeper than needed, but I'm not a youngster with eagle eyes and the hands of a surgeon - and I'm working with
 tools.


-
The 2 oz. bottle of 100% Tung came in from Amazon / Lombardi's Woodworking today.

Got a good coat on the Spartan I got from Lowtech. Rubbed it in good, then wiped off after about 30 minutes per the instructions on the bottle. Smells almost like popcorn, even made me hungry working it in.

Rubbed a light layer on the insides of my Climber's scales. They will set for 24+ hours before I epoxy them on. Wanted to get some oil in the groove channels before gluing them on.
 Am anxious to get the scales on and oiled in.
-
Was waiting for some walnut scales to come in before epoxying the last set of Australian Silky Oak on.
With the weather being the way it is, couldn't wait much longer. One scale developed a workable warp and the other had a noticeable gap. Filed them down and went ahead and epoxied them the scales on. They are clamped in and drying between two cedar wood scraps & a sock.
More solid wood scales would not have such a tendency to warp as compared to scales that are channeled out for tools. The more wood removed the easier a warp can set in.
We had fair weather, then it turned more humid with the rain. And a strong the cold front is coming in. So rather than deal with warps it was time to get them epoxied and and oiled up.After setting the scales on, gave them and even clamping all around. Oiled up the scale tools I had made channels for (pin, pen, toothpick, & tweezers) with a Teflon based lubricant. Ran them in and out a few times, wiped them off, and inserted the tool back into the scales.
In case some epoxy got squeezed out the tools would be safe from being stuck. In turn the tools are also inside to help keep any epoxy at bay.The first set of scales got their second coat of Tung oil this evening. They feel as smooth as silk too. :D
May have to pick up a Spartan, or a used SAK, to fit the walnut scales coming in from Woodman. I waited, but the weather forced my hand.

-
Nice progress pics.

-
Figured my notes, good and/or bad, might help others.
Y'all were of immense help too, and I won't forget that. ;)
If I could afford it, would buy everyone a pizza and a 6 pack of Foster's oil cans for their help.Perhaps once I get this process down better, find a good user SAK, will have a contest for those that offered their help their help. Would help make up for being such a pest. :D As it stands now my work and ideas are amateurist at best. Have learned a lot, but I want to make it right - and done right.
Biggest issue I have is the accurate placement of the pin holes. Want to get some liners or solid template.
Another idea I had was to glue layer a thin (0.5 mm) composite material on the underside before ever touching the underside. This is to alleviate the scooping that occurs when filing & sanding.
-
These sets of scales fit on really well. Had to do some minor fitting around the edges. None of the channel grooves had issues, Thank God. More light sanding, that in turn dulled the clear Vic logo (epoxied) window inlay. Wished the logo inlay would have come out better. Oh well.
Got the first coat in on these, lets them soak in till the oil started to turn, then wiped it off. For some reason the thinner scales felt better after their first application. These felt more rough textured. Might been due to more oil being soaked up.
One other thing I have noticed since owning SAK is that I barely have any useable finger & thumb nails. Chipped my right hand's thumb nails again fanning the blades for the photographs.
Side by Side
• Photos are of different sizes. Was looking for ambiance not comparative size.

Edge to Edge
• To show the 6mm layers. More beefier. :D

Light Play effects
• Each side differs in looks as Australian Silky Oak grain grows in two different directions at once.


Enjoy!
End Notes:
• Looks like one scale is a tad thicker. Hmm.
• Oh, and the small round spots on the scales was where I drilled a bit too deep and sanded down over said holes. Mixed some glue with sawdust to fill these holes. Will have to consider getting a Dremel Workstation for drilling more accurately. /sigh
• This was my personal knife sonearperfection was not needed.
• My first set actually turned out better me thinks. But the scale tools hide & fit better on these. Maybe 4.5mm to 5mm is what to shoot for in thickness? -
WoodMan's laser cut walnut scales arrived today. Figured right after I glued mine on they would get here. Will have to go find a SAK somewhere to put these on to tease the forum with. :D


-
Am considering ordering more silky oak, as I want a pair of chopsticks out of that wood. And want to use tung oil to finish them. Favorite pair of chopsticks is 9.5" long, Thai style in rosewood, tapered down to 3mm. Only thing is I have no wood lathe/turner.
Have a few sets, but when they taper to 4+ mm that is too thick and awkward for me to use. Feels like I am using pencils (eraser end) for eating utensils.
Top is my favorite set. Below them are backups with an ornate twist carving.

@PTRSAK said:
more timber fromm the same supplier... Brown Mallee BurlI am seriously looking forward to getting a SAK scaled in this.

Interesting wood. Wonder how Zebra wood is? Seems to me when carving the edge it really brings out the wood effects more.
Saw an outfit here in the states with several wood samples perfect for SAK scales, but the way they had cut the wood left a lot to be desired. Was more like a package of 'Oops cuts'.
Turning Timbers seems to know how to cut the wood the correct way!
-
Australian Turning Timbers has some attractive blanks up again. If only had more money to work with, and a shop. Might have to wait till Spring so can carve outside.
Coolabah Burl

Birdseye Red Gum

African Wenge

Brush Box

Fiddleback Queensland Narrow Leaf Wattle - Am liking this one!

Lots more.
-
Heh, now I want to carve a small eating spoon from wood. Shouldn't be too hard, right?

-
Had to, was my post anyhow. :D
Now if I could remember where I put the first SAK post where the forum helped me for the most part, and I decided on a Climber.
-
@Outback in Idaho said:
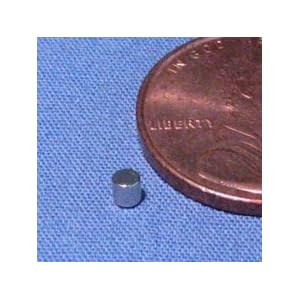
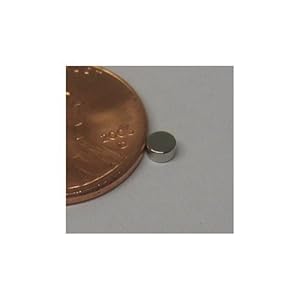
For the pin, having a recent issue with the pin getting caught on the corkscrew, had come up with the idea of putting a small magnet into the handle. This would also help keep the pin magnetized & held into place since my Climber has aluminum scales.Debating between these two, unless someone else has another option. Have tried the flexible magnet inside the current plastic scale and it just does <u>not</u> do a thing. Not enough magnetic power there.
15 PC Neodymium Magnets N42 Dia 2X2mm Rare Earth NdFeB Magnets
50 Pieces N42 Neodymium Magnets Dia 3mm x 1.5mm Thick
Comments, suggestions, or...
 ?
I know this post had been out for a while now, but I had just come across this. Not to sure If it has been answered as well.
A friend of mine suggested if the straight pin comes loose, try applying a bit of silicone sealant in the hole. So I tried and walah, mo more loose straight pins...

Sent from my iPhone using Tapatalk



Hello! It looks like you're interested in this conversation, but you don't have an account yet.
Getting fed up of having to scroll through the same posts each visit? When you register for an account, you'll always come back to exactly where you were before, and choose to be notified of new replies (either via email, or push notification). You'll also be able to save bookmarks and upvote posts to show your appreciation to other community members.
With your input, this post could be even better 💗
Register Login


