
Newbie modding SAKs
-
@Teno said:
Love them both!
The micarta is glued to the knife?Enviado desde mi SM-T210 mediante Tapatalk
Sadly, yes.
I wanted to be able to snap the scales on like cellidor ones, but as i needed to test fit a few times i finally broke the recessed holes i had done... So i ended glueing the scales with epoxy instead.
-
Thank you :D
**Project 3: Ti Sentry **(let's start with something simple)
Part one: disassembling the baby ==> nothing new regarding this part, just the usual stuff
removing red nylon scales

Drilling rivets (let's try not ruining the bushings this time
 )

Removing bushings:

Tear down completed !

But, wait, i've been told Victorinox was using 1.6mm rivets for Classic and 2.25/2.4 for the Alox... but ... 84mm Sentry has 2.0mm rivets ??? .... need to also get a 2.0mm brass wire then

On the first build (the micarta scales) i used the cellidor scales as template but i've noticed that using the liners gives much better results. So that's how i'll proceed this time :
Using double sided tape and pasting them on the Titanium plate


*
No drilling for today, i'll first need to buy the 2.0mm brass rod before starting to cut in the Ti plate.
Part two coming in a few days :) * -
Part one (bis)
Local retailer doesn't have ANY 2.0mm bras rod
So... let's investigate the anodization part a little more.
As said before i'm using lemon juice as acid solution (i doesn't even have white vinegar at home) until i get some H2SO4.Interesting fact is that with my setup the color depends of 3 parameters: Volts, Time, Surface
i'm using 3 PSU savaged from random stuff:- a computer ATX PSU ==> 12V
- an epson printer PSU ==> 40V
- an old VHS recorder PSU ==> lots of strange voltages available including 34, 48 (wiring the +34V and the - 14V) and 57V (wiring +34V and -23V). It also needs a dummy load to correctly outputs enough current (a computer fan plugged between +12V and gnd is enough)
Making some dots with and brush connected to the - give the following results:
From left to right: 40V waiting from 3 to 15 seconds per dots, the longer the contact the more blue.

With the titanium plate [slightly shorter and wider than a Vic Classic scale] in the water+lemon solution (maximum surface area)
Sand paper (grit 320) between two tests to remove the oxide formed on the surface. (as expected, the higher the voltage the thicker the oxide and the harder the removal)
12V, 5 minutes : dark bronze

34V, 5 minutes : deep violet

You may notice there is no picture at 40V since the Epson printer PSU cannot give enough current when the contact surface is that big...
48V, 5 minutes : deep blue-violet

57V, 5 minutes : blue with some violet

57V, 10 minutes : light blue

it is quite interesting to see that when the PSU start the current is about 160mA @57V, and then it decreases to 10mA after 1minutes.A 'painted' lightsaber and some shading test:

-
@Sparky415 said:
Interesting stuff M+1
-
Very cool

-
With the angle grinder out for a while, the scale making project is on hold
In the mean time, here is a new Ti experiment:
Heating (flame) with some Salt crystals (table salt) held in place my wetting the Ti plate before applying the salt. Heat gives the bronze color, the salt crystals create the blue dots on the surface
-
Part two : drilling and cutting the Ti scales (Classic and Sentry)
Pre-drilling through liners :
(No, this is not a drill press, but a hand drill on a stand)


NB: applying double sided tape long before working is not a good idea, i had some pain to remove the liners without ruining them
Drilling done:


Time to cut the scales out of the Ti plate: Titanium screams while being cut by the hacksaw...


Testing Alignment:


Blank testing the Sentry:

End of this part for now, still lacks the angle grinder to continue the scales :)
*Next is a texture test on Ti that i'm doing right now.
* -
I hope this step by step WIP isn't too boring, if so, don't worry this is the last part!
Part 3: grinding, anodizing, assembling
As the angle grinder is back, that's time to shape the scales: grind grind grind

Sanding the scale border held together to get an even surface:


After sanding a few steps are left before anodizing : drilling bevels in the rivet holes to ease the peening process, breaking the angles on the scale borders
and for fun, 3 dead holes to get textured anodizing

Anodizing result (step by step of that bi-color and shading process may come later if needed.):
Light blue holes : 57V, lemon juice
Shading : 34V, lemon juice

Blank testing (yeah, i should have done that before... at that point the spring is a little recessed behind the scales on the back. Let's say "it's not a bug, it's an undocumented feature"
Note the gold anodized inside

Cutting rivets:

Shorting rivets with a file, using a small plastic sheet to protect the Ti scales:

No pic during peening process, only two hands here :P
And the result:
Sadly the pics does not render the real colors here.
The dots face has the following pattern : light blue dots and scale with violet shading slowly into bronze
The other face is blue>violet>bronze>gold

Conclusion:
 (this gif has far too much tools to represent my build
This build is far from 'professional grade' work (lots of small defects that i could have anticipated... and fixed?) but i think that on the overall it worths the time i spent :)
This build really lacks the Swiss cross, that i can't do without a milling machine (but it would look great with the bi-color anodized dead holes)
What do you think? should i continue this way or did i made horrible mistakes that i shouldn't do ever again? -
@m47mu74nt said:
I hope this step by step WIP isn't too boring, if so, don't worry this is the last part!What do you think? should i continue this way or did i made horrible mistakes that i shouldn't do ever again?
Step by step: **definitely not ** boring - makes it better and very interesting
And all the annodising stuff is fascinatingResult looks great to me
Re quality/mistakes - I can't really see any - so I'd say continue
I guess if you are going to sell on, then you need to correct the mistakes, if there are anyGreat work and thanks for the posts
-
I hope this step by step WIP isn't too boring, if so, don't worry this is the last part!
What do you think? should i continue this way or did i made horrible mistakes that i shouldn't do ever again?
Step by step: **definitely not ** boring - makes it better and very interesting
And all the annodising stuff is fascinatingResult looks great to me
Re quality/mistakes - I can't really see any - so I'd say continue
I guess if you are going to sell on, then you need to correct the mistakes, if there are anyGreat work and thanks for the posts
Thank you for your feedback :-)
Bad pictures help not to show flaws
BTW I won't sell anything, at most those amateur builds will become gifts for friends -
@m47mu74nt said:
...at most those amateur builds will become gifts for friendsYour friends should be happy!
-
Good stuff! I like when people do progress pics, its nice to see how people work and step by steps are much more interesting then just posting the final build. In fact many successful blade makers started off and gained popularity specificly because they showed how they do their work. It draws in an audience.
Some things I thought while reading.
The liners are the best templates as you discovered. I use little clamps to hold them on the material then scribe lines around and remove. I used double sides tape before too.. annoying. :D
I didnt realize how much Ti-6-4 hardens when heated so if you are using any method to cut them that involves heat, drill holes first. This really caught me off guard when I made the fold over clip on the mini champ. It was impossible to tap the holes in that scale after it was heated to fold.
I grind/sand my scales in fully assembled knife mode to get them exactly flush with the backspring. I dont use the 'good' parts that will be in the final build, just junker old ones. Its the only way I can get the perfectly flush.
Keep up the great work!
-
I hope so :)
@Syph007 said:
Good stuff! I like when people do progress pics, its nice to see how people work and step by steps are much more interesting then just posting the final build. In fact many successful blade makers started off and gained popularity specificly because they showed how they do their work. It draws in an audience.thank you, the issue with WIP is that it's difficult to both think about taking pictures and building, at least for newbies :D
@Syph007 said:
Some things I thought while reading.The liners are the best templates as you discovered. I use little clamps to hold them on the material then scribe lines around and remove. I used double sides tape before too.. annoying. :D
hmmm so you don't pre-drill through the liners? as i don't have a good drill press, i need them in place to guide the drill bit :-\
@Syph007 said:
I didnt realize how much Ti-6-4 hardens when heated so if you are using any method to cut them that involves heat, drill holes first. This really caught me off guard when I made the fold over clip on the mini champ. It was impossible to tap the holes in that scale after it was heated to fold.This explains the behavior i faced when trying to cut Ti with the angle grinder!
@Syph007 said:
I grind/sand my scales in fully assembled knife mode to get them exactly flush with the backspring. I dont use the 'good' parts that will be in the final build, just junker old ones. Its the only way I can get the perfectly flush.Keep up the great work!
nice tip! though i can't follow it until i have enough spare parts to make a dummy build dedicated to grinding, for now i already used the two non limited series of SAKs i had.. (the green Classic SD, and that Ecoline Nylon Sentry)
@Boaz said:
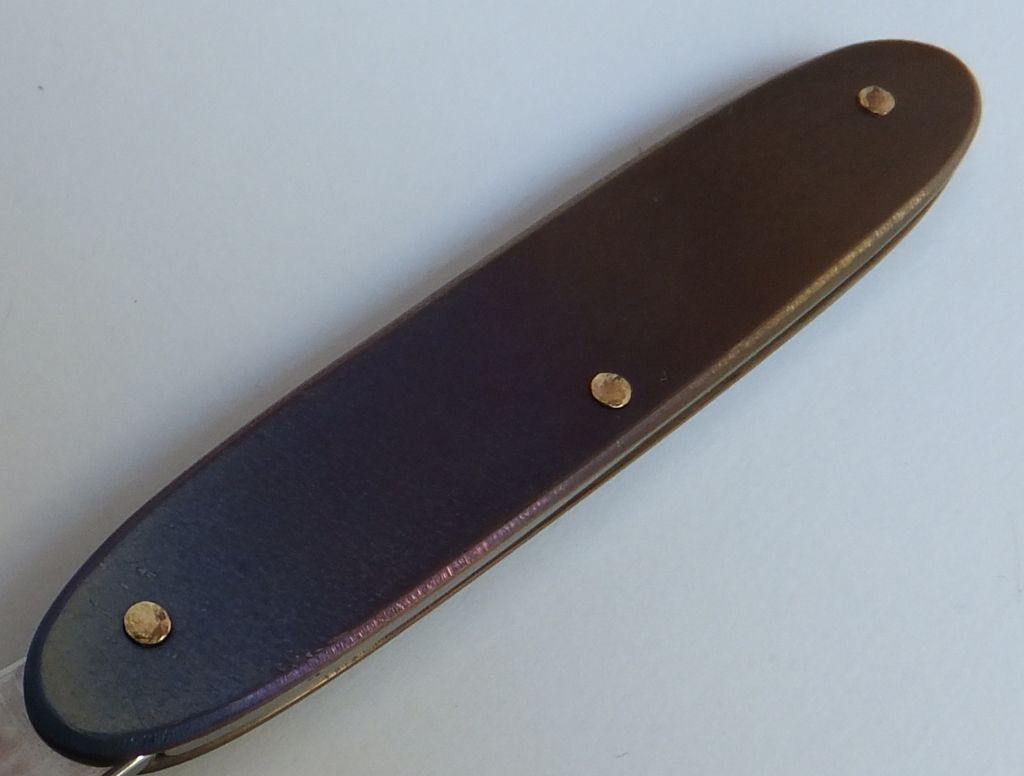
Thanks for sharing, I love to see this sort of project. I think this one looked very nice, I like the 'dead hole' details, it adds a little something. Nice work [emoji1]Here are some better pics: (i've notice with these that my rivets are far from "nice" so i reworked them a little [no pic yet])
The dead holes aren't perfect either, looks like the old milling cutter (dremel one) i used didn't do it's job [or i failed using it]
This time the color scheme is much closer to reality!


-
Some things I thought while reading.
The liners are the best templates as you discovered. I use little clamps to hold them on the material then scribe lines around and remove. I used double sides tape before too.. annoying. :D
hmmm so you don't pre-drill through the liners? as i don't have a good drill press, i need them in place to guide the drill bit :-\
Oh yes I do use the liners as drilling templates too. But I actually take 4-5 liners rivetted together for that purpose so its a nice thick stack. I use this to drill that hidden 4th hole in all the 91mm Ti scales I do.
-
@Syph007 said:
Oh yes I do use the liners as drilling templates too. But I actually take 4-5 liners rivetted together for that purpose so its a nice thick stack. I use this to drill that hidden 4th hole in all the 91mm Ti scales I do.Is there any thing i should really know before messing with a 91mm? i'd like to make one for a friend's birthday, but before failing i need some advices: is that much more complicated than a Classic?
i've already found that peening the 84mm rivets (used 2.0mm brass rod) is slightly more complicated than the 1.5mm i used for the Classic. Plus i'm a little worried about the back tools...On another subject i'm preparing a post about my process of bi-color anodizing, if anybody wants to make colored recessed swiss cross in their Ti builds that could help :) (it is not a revolution, but it's quite different from what i've read before starting)
-
I used 2x2.5mm and 2x2mm brass nails. I think 2.5mm on ends were easier. Also I did some errors with tools so had to rebuild my handyman plus. So good to check everything before peening. I would like to know if there would be simple tools and parts to do riverts like vic have (no need for hammering). Looks like pressed.





Hello! It looks like you're interested in this conversation, but you don't have an account yet.
Getting fed up of having to scroll through the same posts each visit? When you register for an account, you'll always come back to exactly where you were before, and choose to be notified of new replies (either via email, or push notification). You'll also be able to save bookmarks and upvote posts to show your appreciation to other community members.
With your input, this post could be even better 💗
Register Login


