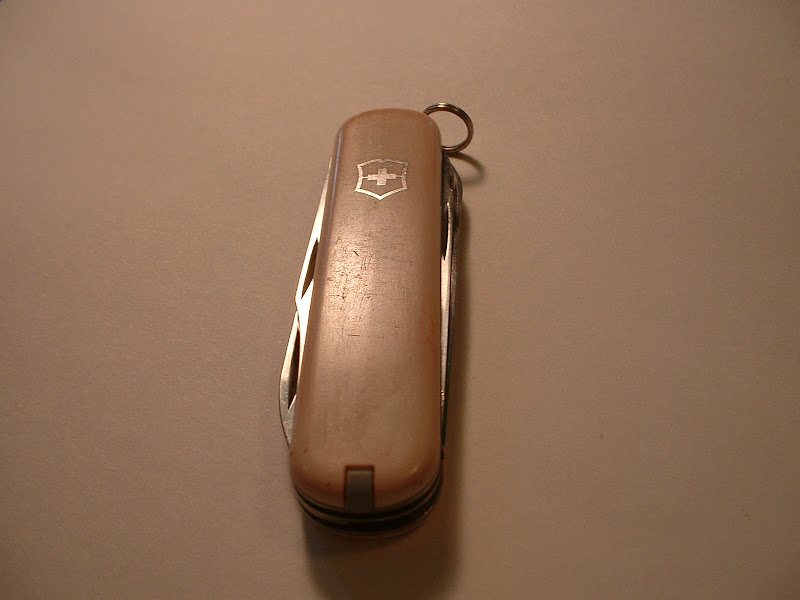
Shiny Scales.
-
Here we go, as you can see the shine come up well.
Before:

After:

This seems to be the best shine I can get but it only takes a minute.
-
I use a set of fine sandpaper blocks from a hobby craft website(micro-surface.com). It takes some work but the results are awesome! I only do it for the better or collectible knives I own.
<a href="http://picasaweb.google.com/lh/photo/fmJZcDf7gwb3TCl521Rw8Q"><img src="http://lh3.ggpht.com/_gqsDXwvKqE4/SBN6oSWurGI/AAAAAAAAAPI/S3iVPBwDijc/s800/White before-02.JPG" /></a>
From <a href="http://picasaweb.google.com/stressmaster5000/SAKKnifeCleaningAndTools">SAK Knife Cleaning and Tools</a><a href="http://picasaweb.google.com/lh/photo/UO4DWxuShhRpGmC8Lur-kg"><img src="http://lh4.ggpht.com/_gqsDXwvKqE4/SBN64iWurII/AAAAAAAAAPY/FsSECIqIgTw/s800/White after-02.JPG" /></a>
From <a href="http://picasaweb.google.com/stressmaster5000/SAKKnifeCleaningAndTools">SAK Knife Cleaning and Tools</a>As you can see all but the deepest scratches can be removed.

-
The sanding and craft kits I have bought from this website are fairly priced and include a high gloss polish but I have always liked the gloss the regular sanding blocks do so I have never used the high gloss polish! The grits of sanding blocks start at 1500 and go up to 12000 in 9 different grit steps.
-
Wow, that is shiny. Thanks for the tip.
-
Just in case anyone here is thinking of buying from these folks, I have bought both the "Craft" kit and the "Hobby" kit. I like and use the "Craft" kit. The main differences are the "Hobby" kit has 6 various grits of sandpapers from 2400 to 8000 in 10x7.5 cm sheets with a separate foam block to use them with. The "Craft" kit has 9 various grits from 1500 to 12000 in self contained, double sided, foam backed pads of 5 cm squares. This makes them last longer since you can switch sides when one side gets used up. Here is the link to the kits;
Craft Kit - https://www.micro-surface.com/default.cfm?page_id=175#23Hobby Kit - https://www.micro-surface.com/default.cfm?page_id=175#18
-
That particular piece is a Victorinox Executive and it had a red tinge all around the edges and numerous scratches. I started at 1500 and used all of the pads up to and including 12000. While it is an incredible shine, it did take about 25-30 minutes of work to do both sides. Looking at the 2 photos you can still see a couple of the deeper scratches from the start are still there. I could have worked more with an even lower grit paper and probably removed all the marks.
It is not a big deal to me but the extreme sides of the scales can not be completely worked since I do this with the scales still attached to the knife. The blades and other tools get in the way for perfection, but I am happy with it.
Another thing, some may ask about the metal inlays like the shield and Fish or BSA symbols. I have yet to see ANY problems working right over the top of them. They polish up nicely right along with the scales. Of course I would not do this with any kind of screen printed art work.
-
Thanks for the info. The result was well worth the effort in my humble opinion.

I was actually going to ask about polishing the shield. I have one SAK where the shield sticks out a bit, and I was thinking about sanding it flat.
Incidentally, did you try to repair that cracked scale yet? If so, how did it go?
-
I'll just add a word of caution on the little knives. There isn't much plastic over the toothpick / tweezer slot and if you are trying to rub out deep scratches you can crack the plastic there. If you have deep scratches on any SAK and are starting out with a coarse grit it is possible to wear the inlaid shield away. I've done it

On vintage knives I'd stick to a little brasso. Sure you want your knife to look good in your collection but I don't think it hurts to have it still look like it seen a few years service; character and all that. :)
Neil
-
Good advice Neil. I've improved on my results by using a liquid stainless steel cleaner (intended for pots and pans) first, then going with the Brasso. It won't remove bigger scratches or dings but does give a good finish otherwise.
-
@NKB said:
I'll just add a word of caution on the little knives. There isn't much plastic over the toothpick / tweezer slot and if you are trying to rub out deep scratches you can crack the plastic there. If you have deep scratches on any SAK and are starting out with a coarse grit it is possible to wear the inlaid shield away. I've done itOn vintage knives I'd stick to a little brasso. Sure you want your knife to look good in your collection but I don't think it hurts to have it still look like it seen a few years service; character and all that. :)
Neil
Neil hits on a very good point there. Although it is nice to polish them up a little bit, I like SAK's and any other tools to show there wear marks. It's part of the tools history.
-
Will Brasso give a high enough polish for reflecto-porn photos? ::) :o :D
-
:ahhh
That's NOT how I want to find out what you all look like.





Hello! It looks like you're interested in this conversation, but you don't have an account yet.
Getting fed up of having to scroll through the same posts each visit? When you register for an account, you'll always come back to exactly where you were before, and choose to be notified of new replies (either via email, or push notification). You'll also be able to save bookmarks and upvote posts to show your appreciation to other community members.
With your input, this post could be even better 💗
Register Login