Skip to content
Collapse
? [[global:guest]]
Unread Recent
HOME SEARCH PROFILE NOTIFICATIONS 0 MESSAGES 0 BOOKMARKS MEMBERS BADGES
Multitool.Org Forum
MultiTool.org • Community Header Space • Watch This Space

A "how-to" for basic SAK mods. Pic heavy.

Scheduled Pinned Locked Moved The Mod Squad
165 Posts 1 Posters 137.3k Views
  1. Home
  2. Tool Talk
  3. The Mod Squad
  4. A "how-to" for basic SAK mods. Pic heavy.
A "how-to" for basic SAK mods. Pic heavy.
  • Oldest to Newest
  • Newest to Oldest
  • Most Votes
Reply
  • Reply as topic
Log in to reply
This topic has been deleted. Only users with topic management privileges can see it.
  • zepla Offline
    zepla
    Posts: 1,053
    zepla Offline
    zepla
    wrote on last edited by
    #40 Quote Reply

      Not into SAK's myself but I have to say that's a great tutorial :tu: Even I got it! :D ::)

      1 Reply Last reply
      • DannyZRC Offline
        DannyZRC
        Posts: 94
        DannyZRC Offline
        DannyZRC
        wrote on last edited by
        #41 Quote Reply

          is there a good resource for layer construction? a compendium of sorts?

          it can be a bit difficult to divine exactly how the various tools go together from photos on the net, some things are quite obvious but other things can be quite difficult (like what backside tools play nice with what layers)

          1 Reply Last reply
          • Nikos Offline
            Nikos
            Posts: 3,785
            Nikos Offline
            Nikos
            wrote on last edited by
            #42 Quote Reply

              That would be really great! Not only would it help wannabe SAK modders, it would also help seasoned mod guys with those pesky "clients" requesting all sorts of bizarre and weirdo tool combos... ::) :D

              1 Reply Last reply
              • Gareth Offline
                Gareth
                Admin Team
                Posts: 37,725
                Gareth Offline
                Gareth
                Admin Team
                wrote on last edited by
                #43 Quote Reply

                  It's a good idea, let me think about it. What I'll try and come up with is a list of tools that can be used with no modification to the parts themselves and that will fit perfectly. For example you can put a chisel in place of the awl but the chisel is slimmer and won't be a perfect fit.

                  1 Reply Last reply
                  • Gareth Offline
                    Gareth
                    Admin Team
                    Posts: 37,725
                    Gareth Offline
                    Gareth
                    Admin Team
                    wrote on last edited by
                    #44 Quote Reply

                      OK so the very basics for a 91mm SAK are:

                      Main blade:
                      Opposite; small blade, combo tool or very rarely electrician and pruning blades (only currently found on the Master Electrician or Gardner or the XXVT?)
                      Back tool; corkscrew or Phillips screwdriver.

                      Metal saw/file:
                      back tool; small chisel, small flat screwdriver or plain backspring with no tool.

                      Wood saw:
                      back tool; small chisel, small flat screwdriver or plain backspring with no tool.

                      Fish scaler/ruler: plain backspring with no tool.

                      Scissors:
                      Back tool; parcel hook, parcel hook with nail-file (only from the Compact) or plain backspring with no tool (older SAKs).

                      Pliers: plain backspring with no tool.

                      Magnifier:
                      Opposite; in-line Phillips or White LED. The layer can be a combination of any two of the three tools.
                      Back tool; plain backspring with no tool.

                      Cap lifter:
                      Opposite; can opener
                      back tool; awl.

                      This is the basics, there a plenty of tool layers out there that I haven't listed as I have no personal experience with them, I'm sure chaps like Spork or NKB could add to this.

                      As you can see without re-grinding tools or producing a less then perfect fit your options are a little more limited than people might wish for.

                      1 Reply Last reply
                      • Neil Offline
                        Neil
                        Posts: 15,287
                        Neil Offline
                        Neil
                        wrote on last edited by
                        #45 Quote Reply

                          @Gareth said:
                          OK so the very basics for a 91mm SAK are:

                          Main blade:
                          Opposite; small blade, combo tool or very rarely electrician and pruning blades (only currently found on the Master Electrician or Gardner or the XAVT?) Watch opening blade (from the Bantam frame) also fits if redrilled to 2.5mm, Divot repair tool from Golfer II, Small screwdriver from Automobile (anyone stripping such a rare knife for the tool will face the Budgies of Pain)
                          Back tool; corkscrew or Phillips screwdriver.

                          Metal saw/file:
                          back tool; small chisel, small flat screwdriver or plain backspring with no tool.

                          Wood saw:
                          back tool; small chisel, small flat screwdriver or plain backspring with no tool.

                          Fish scaler/ruler: plain backspring with no tool.

                          Scissors:
                          Back tool; parcel hook, parcel hook with nail-file (only from the Compact) or plain backspring with no tool (older SAKs). Some old SAKs also have a long nailfile on the back of the scissors, again they're rare so think twice before stripping.

                          Pliers: plain backspring with no tool.

                          Magnifier:
                          Opposite; in-line Phillips or White LED. The layer can be a combination of any two of the three tools. Old style magnifier and phillips do not work on the new backspring.
                          Back tool; plain backspring with no tool.

                          Cap lifter:
                          Opposite; can opener
                          back tool; awl.

                          Spatula: nothing on the back
                          Lighter: nothing on the back

                          This is the basics, there a plenty of tool layers out there that I haven't listed as I have no personal experience with them, I'm sure chaps like Spork or NKB could add to this.

                          As you can see without re-grinding tools or producing a less then perfect fit your options are a little more limited than people might wish for.

                          Nice list Gareth. I've muddied the waters a little in blue above. I've probably missed bits as well.

                          Neil

                          1 Reply Last reply
                          • Gareth Offline
                            Gareth
                            Admin Team
                            Posts: 37,725
                            Gareth Offline
                            Gareth
                            Admin Team
                            wrote on last edited by Gareth
                            #46 Quote Reply

                              I was asked about the 84mm over on SOSAK so here is the list to the best of my knowledge. Off the top of my head the 84mm is pretty easy. Again this should just be tools that don't require any reshaping to make them fit.

                              main blade/rounded tip blade
                              Opposite: Combo tool, small blade, small clip point blade (retired and from fairly old SAKs), nail file, watch opener, electricians blade, cap lifter (very rare, it was used before they came up with the combo tool)
                              back: corkscrew, Phillips or plain backspring.

                              Saw blade.
                              plain backspring.

                              Scissors (retired tool)
                              plain backspring or long nail file (this is rare so think twice about stripping one if you have it)

                              Cap lifter
                              opposite: can opener
                              back: awl or plain backspring.

                              Metal file (again an old and rare tool so only to be used for modding if the rest of the SAK is ruined, OK? :))
                              plain backspring.

                              This also doesn't cover the Pocket Pal form of SAKs as I've never worked on one.

                              Anyone please feel free to jump in if I've made any glaring errors or missed anything out.

                              1 Reply Last reply
                              • nuphoria Offline
                                nuphoria
                                Admin Team
                                Posts: 15,038
                                nuphoria Offline
                                nuphoria
                                Admin Team
                                wrote on last edited by
                                #47 Quote Reply

                                  Most useful chaps, thanks :tu:

                                  I'd like to add that you can put other things on the back of the blades if you use a scale and liner which isn't cut out - an awl for example. It's a bit more fiddling around but it you don't want the corkscrew/phillips option it gives other possibilities :)

                                  1 Reply Last reply
                                  • Gareth Offline
                                    Gareth
                                    Admin Team
                                    Posts: 37,725
                                    Gareth Offline
                                    Gareth
                                    Admin Team
                                    wrote on last edited by
                                    #48 Quote Reply

                                      @nuphoria said:
                                      Most useful chaps, thanks :tu:

                                      I'd like to add that you can put other things on the back of the blades if you use a scale and liner which isn't cut out - an awl for example. It's a bit more fiddling around but it you don't want the corkscrew/phillips option it gives other possibilities :)

                                      You're quite right you can do that, but it isn't quite a perfect fit is it? Without looking isn't the awl a touch slimmer than the corkscrew?

                                      1 Reply Last reply
                                      • nuphoria Offline
                                        nuphoria
                                        Admin Team
                                        Posts: 15,038
                                        nuphoria Offline
                                        nuphoria
                                        Admin Team
                                        wrote on last edited by
                                        #49 Quote Reply

                                          @Gareth said:

                                          @nuphoria said:

                                          Most useful chaps, thanks :tu:

                                          I'd like to add that you can put other things on the back of the blades if you use a scale and liner which isn't cut out - an awl for example. It's a bit more fiddling around but it you don't want the corkscrew/phillips option it gives other possibilities :)

                                          You're quite right you can do that, but it isn't quite a perfect fit is it? Without looking isn't the awl a touch slimmer than the corkscrew?

                                          Yep, tiny bit thinner but I got away with it on a 2-layer. Not sure how well it would work with anything thicker. Are there other backtools that are any thicker that would fit?

                                          1 Reply Last reply
                                          • Neil Offline
                                            Neil
                                            Posts: 15,287
                                            Neil Offline
                                            Neil
                                            wrote on last edited by
                                            #50 Quote Reply

                                              There's the hook. Its OK width wise but its tang is a fraction too shallow which can lead to lack of snap. If you could weld a tiny blob onto it that's all it would take to make a really good fit. Alternatively you can just thin out the awl a tad.

                                              1 Reply Last reply
                                              • nuphoria Offline
                                                nuphoria
                                                Admin Team
                                                Posts: 15,038
                                                nuphoria Offline
                                                nuphoria
                                                Admin Team
                                                wrote on last edited by
                                                #51 Quote Reply

                                                  @Neil said:
                                                  There's the hook. Its OK width wise but its tang is a fraction too shallow which can lead to lack of snap. If you could weld a tiny blob onto it that's all it would take to make a really good fit. Alternatively you can just thin out the awl a tad.

                                                  Welding?! Oh my, not more skills I must acquire :O

                                                  1 Reply Last reply
                                                  • John Offline
                                                    John
                                                    Posts: 4,320
                                                    John Offline
                                                    John
                                                    wrote on last edited by
                                                    #52 Quote Reply

                                                      Thanks Gareth I'm deff going to mod my compact now,just add an awl and saw I think,yes I said saw ::) :D I just need to know what liners to use and where to place the saw in the compact now :think:

                                                      1 Reply Last reply
                                                      • Stirling3749 Offline
                                                        Stirling3749
                                                        Posts: 261
                                                        Stirling3749 Offline
                                                        Stirling3749
                                                        wrote on last edited by
                                                        #53 Quote Reply

                                                          Can the awl go on the back of the file or saw? too thin perhaps?

                                                          1 Reply Last reply
                                                          • Neil Offline
                                                            Neil
                                                            Posts: 15,287
                                                            Neil Offline
                                                            Neil
                                                            wrote on last edited by
                                                            #54 Quote Reply

                                                              You can thin down an awl to fit but its easier to sharpen a flat driver into an awl :)

                                                              1 Reply Last reply
                                                              • Pacu Offline
                                                                Pacu
                                                                Posts: 5,782
                                                                Pacu Offline
                                                                Pacu
                                                                wrote on last edited by
                                                                #55 Quote Reply

                                                                  sooo how do you mod alox? Taking off the scales would be the major hurdle i gander.

                                                                  I do like Nuphoria's copper cadet with scissors :drool:

                                                                  1 Reply Last reply
                                                                  • Stirling3749 Offline
                                                                    Stirling3749
                                                                    Posts: 261
                                                                    Stirling3749 Offline
                                                                    Stirling3749
                                                                    wrote on last edited by
                                                                    #56 Quote Reply

                                                                      @Neil said:
                                                                      You can thin down an awl to fit but its easier to sharpen a flat driver into an awl :)

                                                                      Ah yeah I meant to say "too thick?" as it does seem quite a bit thicker.
                                                                      I think I'm going to go with your approach, just found some nice info on the SOSAK forums. thanks. :)

                                                                      1 Reply Last reply
                                                                      • ryanrrx Offline
                                                                        ryanrrx
                                                                        Posts: 83
                                                                        ryanrrx Offline
                                                                        ryanrrx
                                                                        wrote on last edited by
                                                                        #57 Quote Reply

                                                                          @Gareth said:
                                                                          Here is a little “how-to” guide to a basic SAK mod on a 91mm cellidor knife, although most of the ideas are the same for other sizes as well. I suspect ever modder has a slightly different way of doing things but this is the way that works for me with only a few basic tools, as can be seen in the first pic.

                                                                          First thing to do is to pop off the scales from your donor knives. I use an old SAK with a fairly blunt small blade and slip it under the scale. Move it up to just behind the pin and pop the scale up. Repeat for the other two pins.
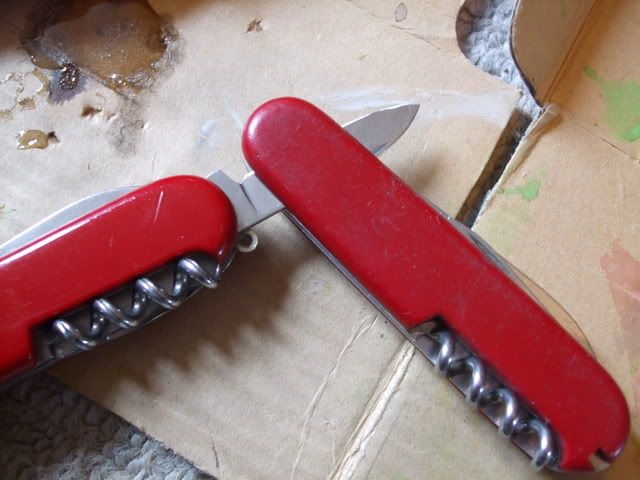
                                                                          Next you are going to drill out the pins. You can see here that I start with a centre mark on the pin head to act as a guide for the drill. After taking the pic I realised the mark was a bit off and so did it again.

                                                                          Now all you need to do is drill out the pin. I use a 2.5mm bit. Take care not to drill too much and damage the bushes. For the pin holding the back tools I do a very little drilling and then file the rest of the head off. All you need do then is punch through the pins to release the tools and backsprings. Remember and take note of which is the centre bush as it is smaller than the other two.

                                                                          Now you will have a pile of bits and there is no going back. Take this opportunity to give all the tools, liners etc a good clean. Most of the time a bit of a scrub with a scour pad will do the trick.

                                                                          A quick shot here to show the new and old liners next to the blades. On the new liner (top) you can see an indent that will sit next to the blade tang. This is to compensate for the slimmer tang that can be seen on the newer blade next to it. The most important thing you need to keep in mind is not to mix up old and new parts. They won’t work and the blade will sit wrong in the finished knife, striking the top of the small blade. Ask me how I know. ::)

                                                                          The next thing I do is to prep up the new pins. If you can get pin stock that is 2.5mm for the outside pins and 2.2mm for the centre ones (2.25mm is the Vic standard but I don’t think anyone has yet found a supplier). I always give myself plenty of extra length to work with. If you look at the pin sitting on the vice you can see the “peak” left after having cut it to size with a pair of snips. You need to file this flat to give a nice even surface to work on.

                                                                          Take a small hammer and peen over the edge to give a nice, flattened, mushroom shaped top. Repeat the filing and peening for all four pins. The last part is to lightly file the other ends of the pins to a slight point. This will help in getting the tools and liners to slip over the ends.

                                                                          You can now put the bushings on the peened end of the pins (make sure the bushes are sitting the right way up) and put them through the full liner. I always start from the opener side and work up to the blades. This lets the SAK sit flat without rocking on the corkscrew that sits out quite a bit. You can also keep a made up SAK near to hand as a reference, just to make sure you are putting things in the right place.

                                                                          As I don’t use a jig of any kind you will almost inevitably come across the problem of getting the tool to sit well with the spring. Don’t worry; get all but one of the tools sitting where they should be. One of the tools will end up sitting like the saw below, that's OK just drop on the next liner.

                                                                          I have had to do the next bit with two pics, simply because I don’t have an extra hand to hold the camera. Hold everything together with one hand as seen in the first pic. You can see the tool sitting beside the spring instead of on top of it.

                                                                          With the other hand put a fine screwdriver or similar between the pin and the spring. Leaver the spring away from the pin and keep strong pressure on with the other hand. When you remove the screwdriver everything should pop into place. Repeat this for all the layers. You may find this tricky at first but with just a little practice this takes no time at all.

                                                                          We are now on the home straight. :) When you have the blade layer in place (don’t forget the spacer next to the small blade), along with the last liner, we need to look at the final peening. Drop the bushes onto the pins. You will now need to cut the pins to length. Try not to make the pin to long, you only need 1-1.5mm to work with. Once cut you will have the same nasty tool marks as you did when prepping the pin. As before you will need to file the top flat for a good surface to work on. Once you have it ready then give it a couple of strong taps while holding the SAK on a flat metal surface. I use one of the flats on my vice as an improvised anvil. Use the ball-peen to help work the edges of the pin out to fill the bushing. You can see the three stages here: the far right pin has just been cut, the one next to it has been filed and the one on the far left has mostly been peened.

                                                                          The MOST important thing is not to over do it. Keep checking the tools for any side play, once it has gone stop hitting the pin! If you still have any metal sitting proud of the bushing then file it down (the scales won’t go on it you have to much there). Once you have cut, filed and peened all the pins give the tools a last check over for any play and pop the scales on. Job done, you are now the proud owner of your first mod.

                                                                          As I said at the start there are certainly other ways of doing this. This way works for me, but if I have made any glaring errors (either in the modding or the writing) please jump in and say so. Thanks for reading. :salute:

                                                                          i love that saw wow it looks beffy wowzers..

                                                                          1 Reply Last reply
                                                                          • Stirling3749 Offline
                                                                            Stirling3749
                                                                            Posts: 261
                                                                            Stirling3749 Offline
                                                                            Stirling3749
                                                                            wrote on last edited by
                                                                            #58 Quote Reply

                                                                              No argument there Ryanrrx. Vic saws are the best for their size.

                                                                              1 Reply Last reply
                                                                              • ryanrrx Offline
                                                                                ryanrrx
                                                                                Posts: 83
                                                                                ryanrrx Offline
                                                                                ryanrrx
                                                                                wrote on last edited by
                                                                                #59 Quote Reply

                                                                                  ive never seen one like that
                                                                                  i serioisly wana mod that into my skeletool or style cs
                                                                                  i doubt it will fit thoe

                                                                                  1 Reply Last reply

                                                                                  Hello! It looks like you're interested in this conversation, but you don't have an account yet.

                                                                                  Getting fed up of having to scroll through the same posts each visit? When you register for an account, you'll always come back to exactly where you were before, and choose to be notified of new replies (either via email, or push notification). You'll also be able to save bookmarks and upvote posts to show your appreciation to other community members.

                                                                                  With your input, this post could be even better 💗

                                                                                  Register Login


                                                                                  • 1
                                                                                  • 2
                                                                                  • 3
                                                                                  • 4
                                                                                  • 5
                                                                                  • 8
                                                                                  • 9
                                                                                  1. Home
                                                                                  2. Tool Talk
                                                                                  3. The Mod Squad
                                                                                  4. A "how-to" for basic SAK mods. Pic heavy.
                                                                                  Reply
                                                                                  • Reply as topic
                                                                                  Log in to reply
                                                                                  COMMUNITY LINKS
                                                                                  EDC-TV SAKWiki GearFeed SAKSelector
                                                                                  Operational Funds

                                                                                  Help us keep the Unworkable working!

                                                                                  Make A Donation
                                                                                  November Goal: $300.00
                                                                                  Due Date: Nov 30
                                                                                  Total Receipts: $0.00
                                                                                  Below Goal: $300.00
                                                                                  0% funded
                                                                                  • Login

                                                                                  • Don't have an account? Register

                                                                                  • Login or register to search.
                                                                                  • First post
                                                                                    Last post
                                                                                  0