
What did you just get?
-
@MadPlumbarian said:
37 total, yet 41 if you count the 4 extra cars in the train set,, so I got some work!
JRShow us how you're getting on with putting them together.

-
@pfrsantos said:
Show us how you're getting on with putting them together. What the tools I use to do so?
JR -
@MadPlumbarian said:
What the tools I use to do so?
JRWas thinking more about seeing the several construction steps, to see it coming to life. Seeing what tools are used is interesting, too.


-
@pfrsantos said:
Was thinking more about seeing the several construction steps, to see it coming to life. Seeing what tools are used is interesting, too. Ok, I’ll see what I can do, it’s just a little hard to hold the two pieces together, then hold a tool, yet then hold a camera,, but I’ll see what I can come up with, I mean when I’ll do the next one idk cause anyone takes 2-8+hrs, it also takes like 10-15min to setup every time, get in the chair, get the wood desktop setup out, get the tools setup, get the glasses, get the lamp aligned, and everything all perfect before grabbing the model and even starting, and when, idk cause I have to go around the Mrs “I want to do” and well that changes daily just like our weather! lol
JR -
How’s this? It was a little hard getting a clear pic while holding the model, the tool, and the camera which is my iPad, half the time it didn’t want to focus on the part but the table in the background.. but here’s how I do the basics you got to get the little tab in the slots, in most cases you twist them with a mini pair of pliers but in some cases if it’s a display part you have to bend so it doesn’t stick out, just like the parts most are kinda a simple bend but sometimes you have to roll or form them, in this case I used a ruler case and a marker cause they were the perfect size, if bigger or smaller you just find something bigger or smaller! Anyway time for step two.. any other questions ask away!
JR
-
All done, that was kinda fun yet easy, a couple hard bends,, but alls wrapped up, here’s the little tool chest, a plastic ammo can but with a tray I made so the pliers stand upright, with a few other odd tools, like that red one I use all the time which is a leather working tool, I used to do some but I found it works at bending the tabs over in the little hard to reach places,, and that funky blue one, that’s a story in itself, I got the idea from an old school auto body detailing tool and I figured if I add a few things to it that I might be able to get just about any curve I needed to bend, yet someone on here helped me out by taking it from me drafting it and making it 3D into a computer layout, and then I had it printed or whatever you call it, I got to get another but in smaller size to help with the ratio,,
JR


-
@MadPlumbarian said:
How’s this? It was a little hard getting a clear pic while holding the model, the tool, and the camera which is my iPad, half the time it didn’t want to focus on the part but the table in the background.. but here’s how I do the basics you got to get the little tab in the slots, in most cases you twist them with a mini pair of pliers but in some cases if it’s a display part you have to bend so it doesn’t stick out, just like the parts most are kinda a simple bend but sometimes you have to roll or form them, in this case I used a ruler case and a marker cause they were the perfect size, if bigger or smaller you just find something bigger or smaller! Anyway time for step two.. any other questions ask away!
JRYup, that's what I meant. How the little pieces come together, those little tricks to form/shape them. Pretty cool photos, thanks!

-
@MadPlumbarian said:
All done, that was kinda fun yet easy, a couple hard bends,, but alls wrapped up, here’s the little tool chest, a plastic ammo can but with a tray I made so the pliers stand upright, with a few other odd tools, like that red one I use all the time which is a leather working tool, I used to do some but I found it works at bending the tabs over in the little hard to reach places,, and that funky blue one, that’s a story in itself, I got the idea from an old school auto body detailing tool and I figured if I add a few things to it that I might be able to get just about any curve I needed to bend, yet someone on here helped me out by taking it from me drafting it and making it 3D into a computer layout, and then I had it printed or whatever you call it, I got to get another but in smaller size to help with the ratio,,
JRNicely illustrated and the USPS truck is super cool
 . A good design with a lot of details. Even included the left side blind spot mirrors for right hand side driving. And like your DIY pliers stand with Zip Ties
-
@rishardh said:
Nicely illustrated and the USPS truck is super cool. A good design with a lot of details. Even included the left side blind spot mirrors for right hand side driving. And like your DIY pliers stand with Zip Ties Thanks, I kinda got the idea from something like this, I mean it’s pretty much a trimmed 2x4 with holes drilled for the handles, but I wasn’t paying for something like that and I didn’t have any wood at the time so I had a simple $1 tray and a ton of zip ties, you just have to make sure put a support in the middle or else the plastic tray would just collapse,, although now that I have a bunch of 2x4’s maybe I should make a more advanced one to hold the tools I really like then drill smaller holes for the pen like tools so then don’t just fall over?

JR
-
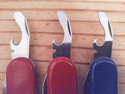
I just got a Mora Eldris, a Schrade mini stockman, and a paracord fob in from Farmer X. I opened the package with my Champion, of course, due to being in the March of Champions Challenge. The Eldris is smaller than I thought it was going to be, but I think it will punch above its weight class for an EDC fixie. The Schrade mini stockman is perfectly sized for fifth pocket carry.

-
Ok, found a small piece of 2x4, literally fit perfect in the plastic ammo box, so I laid it out (in head) then took a few measurements drew a few lines on the wood, made my marks then just simply drilled a few diff size holes, only took about 30min, would have been sooner if I didn’t have to keep changing the bits out that and the dang batteries died, ahh,, anyway here’s a pic of before and after, and what it looks like outside of the box,,
JR

-
@MadPlumbarian said:
Ok, found a small piece of 2x4, literally fit perfect in the plastic ammo box, so I laid it out (in head) then took a few measurements drew a few lines on the wood, made my marks then just simply drilled a few diff size holes, only took about 30min, would have been sooner if I didn’t have to keep changing the bits out that and the dang batteries died, ahh,, anyway here’s a pic of before and after, and what it looks like outside of the box,,
JRNice quick job
. I would have taken a month of Sundays. Carve your initials and it will be ready to pass it on to your son. -
@rishardh said:
Nice quick job. I would have taken a month of Sundays. Carve your initials and it will be ready to pass it on to your son.Thanks, better yet a while back I took a scrappy old bolt and used a Dremel to make a mark on the head so I can stamp my leather, so if I really want I could do that and put a quick stain on it, but again it’s just a simple very cheap 2x4, on top of that I don’t think either of the kids would want it, the one is into tools but we’re talking automotive heavy duty, and the other is more into computer games, so neither would use mini tools, although the one has a matching pair of pliers but for some other reason,,
JR
-
@MadPlumbarian said:
Ok, found a small piece of 2x4, literally fit perfect in the plastic ammo box, so I laid it out (in head) then took a few measurements drew a few lines on the wood, made my marks then just simply drilled a few diff size holes, only took about 30min, would have been sooner if I didn’t have to keep changing the bits out that and the dang batteries died, ahh,, anyway here’s a pic of before and after, and what it looks like outside of the box,,
JRI would have the pliers up the other way so you grab the handle more easily and not the jaws.
Of course then you wouldn't be able to tell which ones are which so easily.









Hello! It looks like you're interested in this conversation, but you don't have an account yet.
Getting fed up of having to scroll through the same posts each visit? When you register for an account, you'll always come back to exactly where you were before, and choose to be notified of new replies (either via email, or push notification). You'll also be able to save bookmarks and upvote posts to show your appreciation to other community members.
With your input, this post could be even better 💗
Register Login


