
Getting back into 3D printers.
-
1- Auto bed leveling is, IMHO an absolute necessity. I got rid of both my first two printers because bed leveling was such a complete PITA and occupied more time than printing did. My current printer is a cheap Da Vinci Mini W+, which doesn't have much going for it (especially now that Da Vinci has gone under) but it does at least have auto bed leveling. I would never suggest anyone gets a printer without this feature.
2- I would 100% go with an enclosed unit for my next one. I am probably going to go with the Bambu Labs models next and I absolutely will go with an enclosed model just to maintain ideal temperature and humidity levels a lot more effectively.
3- I have owned three separate 3D printers from three different manufacturers and I have never printed a Benchy on any of them. As a further crime against the entire industry, I have no intention of ever printing a Benchy on any printers I own in the future.
4- I would very much like to reclaim poop as I hate waste of pretty well any kind. Unfortunately, the cost of grinders and extruders don't seem to have come down as much as the price of the printers themselves. Like many people who have experimented with 3D printing, I have a pile of failed prints that I would absolutely love to reclaim.
5- My Da Vinci is limited to PLA, which admittedly is my filament of choice for most printing, but it would be nice to be able to use different materials, specifically ABS for tougher prints.
6- I am sure your chipped filament rolls won't be as frustrating as the Da Vinci ones, but I have had issues with mine claiming there was no filament left on the spool when there absolutely was, and other issues. As it is, nowadays when I use the machine I leave a blank spool with the "all purpose" chip in it on the printer and I just feed from a spool hanging behind the machine as it's easier than putting up with the machine's bullsmurf.
Def
-
There was certainly no judgement in my post!
It's kind of cool how a Benchy has become the official measurement of speed for 3D printers. :D
Def
-
No offense taken.

So far I am impressed with this printer. Doing my poop chute print in 2 parts. The tray took 5 hours and the chute part will take a couple more hours. The hardest part is using the Anycubic slicer program. The chute part would not fit the build plate once automatic tree support was enabled. Finding the support sub menu was more challenging than I care to admit. I ended up reducing the bottom flange from a 5 to a 4, which appeared to eliminate the error allowing me to print the second piece.
-
Here is a photo of the larger bottom tray for collecting the poop waste materials.
<a href="https://flic.kr/p/2s41pS4" target="_blank" rel="noopener noreferrer"><img src="https://live.staticflickr.com/65535/55167998275_652ebb81d4_6k.jpg" alt="banner" style="max-width: 100%; height: auto;" /></a>PXL_20260323_213837444A by Chako, on Flickr
<a href="https://flic.kr/p/2s3ZHcL" target="_blank" rel="noopener noreferrer"><img src="https://live.staticflickr.com/65535/55167861494_098d4a5b21_6k.jpg" alt="banner" style="max-width: 100%; height: auto;" /></a>PXL_20260323_213843882A by Chako, on Flickr
I am going to attempt installation later today.
Last night I had an issue with the slicer software. After printing the 2 part poop chute assembly, it refused to load anything else. I ended up re-installing the slicer software and that fixed it. I then looked for something cool to print. I came across a flexi beaver. I let it print all night and a half hour past my waking up, it finished.
<a href="https://flic.kr/p/2s41pRY" target="_blank" rel="noopener noreferrer"><img src="https://live.staticflickr.com/65535/55167998270_93264a0511_6k.jpg" alt="banner" style="max-width: 100%; height: auto;" /></a>PXL_20260325_100507115A by Chako, on Flickr
<a href="https://flic.kr/p/2s3ZHck" target="_blank" rel="noopener noreferrer"><img src="https://live.staticflickr.com/65535/55167861469_69865ff909_6k.jpg" alt="banner" style="max-width: 100%; height: auto;" /></a>PXL_20260325_100518395A by Chako, on Flickr
<a href="https://flic.kr/p/2s41pRH" target="_blank" rel="noopener noreferrer"><img src="https://live.staticflickr.com/65535/55167998255_37d2fe1a91_6k.jpg" alt="banner" style="max-width: 100%; height: auto;" /></a>PXL_20260325_114035546A by Chako, on Flickr
<a href="https://flic.kr/p/2s41pRc" target="_blank" rel="noopener noreferrer"><img src="https://live.staticflickr.com/65535/55167998225_ecb9cbe05b_6k.jpg" alt="banner" style="max-width: 100%; height: auto;" /></a>PXL_20260325_114052117A by Chako, on Flickr
These flexi models always fascinate me.
-
Trying my first 2 colour print. This should be interesting. If this works, a dream of mine will be fulfilled. If I like it so much, I might buy a multi head machine down the road that would eliminate the biggest issue with this printer, all the purge waste it produces and the lengthy time to print anything with different colours.
Here I installed the chute part held via 3 hex screws located on the back of the printer.
<a href="https://flic.kr/p/2s42gKW" target="_blank" rel="noopener noreferrer"><img src="https://live.staticflickr.com/65535/55168166120_3afa75a171_6k.jpg" alt="banner" style="max-width: 100%; height: auto;" /></a>PXL_20260325_133936721A by Chako, on Flickr
This design is rather genius. The large tray fits onto the chute for easy removal later.
<a href="https://flic.kr/p/2s42gaN" target="_blank" rel="noopener noreferrer"><img src="https://live.staticflickr.com/65535/55168164140_3c2b8b54d4_6k.jpg" alt="banner" style="max-width: 100%; height: auto;" /></a>PXL_20260325_134048307.PORTRAITA by Chako, on Flickr
The bottom of the removable tray fits on the base of the chute secure. Just pull up when it is time to clean it out.
<a href="https://flic.kr/p/2s417vZ" target="_blank" rel="noopener noreferrer"><img src="https://live.staticflickr.com/65535/55167939923_b61cf15776_6k.jpg" alt="banner" style="max-width: 100%; height: auto;" /></a>PXL_20260325_134108649.PORTRAITA by Chako, on Flickr
I also just loaded the Ace Pro with 3 other filaments. I decided to use the PLA this time, keeping thee high speed and Plus PLA for later. I did have some difficulty loading spool #2 and spool #4. For some unknown reason, the gear feed would not take up the slack. I had to feed the filament in a few times for i to work properly. Not a big issue, but I do remember others having similar issues with the Ace Pro.
<a href="https://flic.kr/p/2s3UEw3" target="_blank" rel="noopener noreferrer"><img src="https://live.staticflickr.com/65535/55166876902_3dcfecc97a_6k.jpg" alt="banner" style="max-width: 100%; height: auto;" /></a>PXL_20260325_140232235A by Chako, on Flickr
-
Ok, the first piece was a breeze to print. I just had to tell the software what colour I wanted to print from and it did everything else. It is a keychain for my homecare nurse that comes in every second day for wound care treatment.
<a href="https://flic.kr/p/2s3ZyuT" target="_blank" rel="noopener noreferrer"><img src="https://live.staticflickr.com/65535/55167832211_b1bad4c494_6k.jpg" alt="banner" style="max-width: 100%; height: auto;" /></a>PXL_20260325_144532210A by Chako, on Flickr
I am very happy I printed the poop shut prior to trying my hand at something multicolour. I can see where there is a lot of wastage purging the single print nozzle between colours, but this little guy did not take that long to print. It turned out great. Here is the waste it generated.
<a href="https://flic.kr/p/2s41oVx" target="_blank" rel="noopener noreferrer"><img src="https://live.staticflickr.com/65535/55167995113_71cd0eaf95_6k.jpg" alt="banner" style="max-width: 100%; height: auto;" /></a>PXL_20260325_144652577A by Chako, on Flickr
I can see a few ways to minimize the waste...print a sheet of objects would maximize efficiency. Try not to print complex objects that necessitate many colour changes, and possibly something in the software that could be tweaked down the road. I might upgrade to a multi head printer down the road once I get used to this one.
-
How 'bout something more MToish?
- YouTube
Auf YouTube findest du die angesagtesten Videos und Tracks. Außerdem kannst du eigene Inhalte hochladen und mit Freunden oder gleich der ganzen Welt teilen.

(www.youtube.com)
:pok: :pok: :pok: :pok:
-
I still have my old Ender3. I'm going to mod it with direct drive and make it my TPU printer as TPU needs to print slow anyways. I now have a Bambu X1C and it's awesome. I use Cura for my Ender3 and Bambu Studio for the X1C. I'm thinking of trying out Orca for both printers.
For your older filament, you might want to think about investing in a filament dryer. I bought the original Sunlu S1 filament dryer when they were doing a kickstarter on it. I use it to dry old filament so it's not brittle. It's been working great. I'm considering upgrading to something that can dry 4 filaments at once.
I have found a use for any failed prints and filament poop. I bought some silicone skull molds and I melt the filament into them to create these skulls. Then I give the skulls away during Halloween. I'm thinking of giving them away at a VW meet I attend so people can use them to create shift knobs.
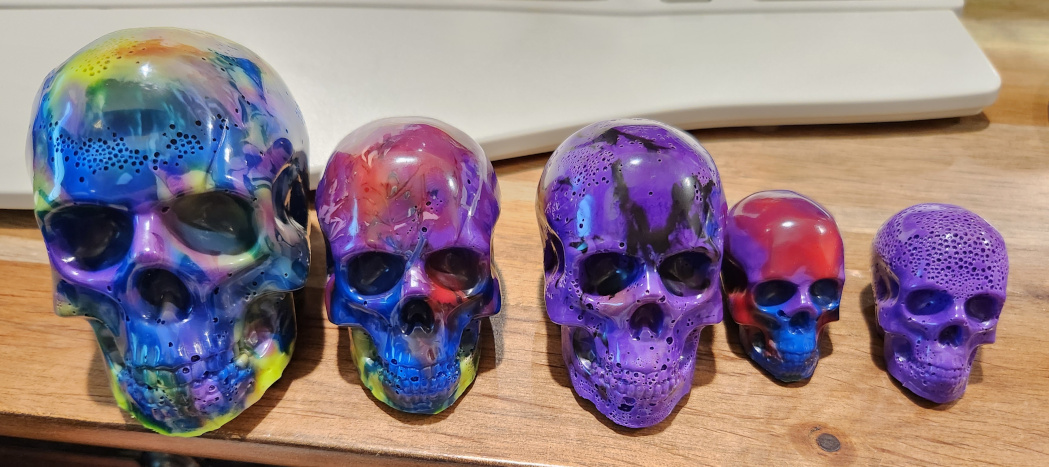
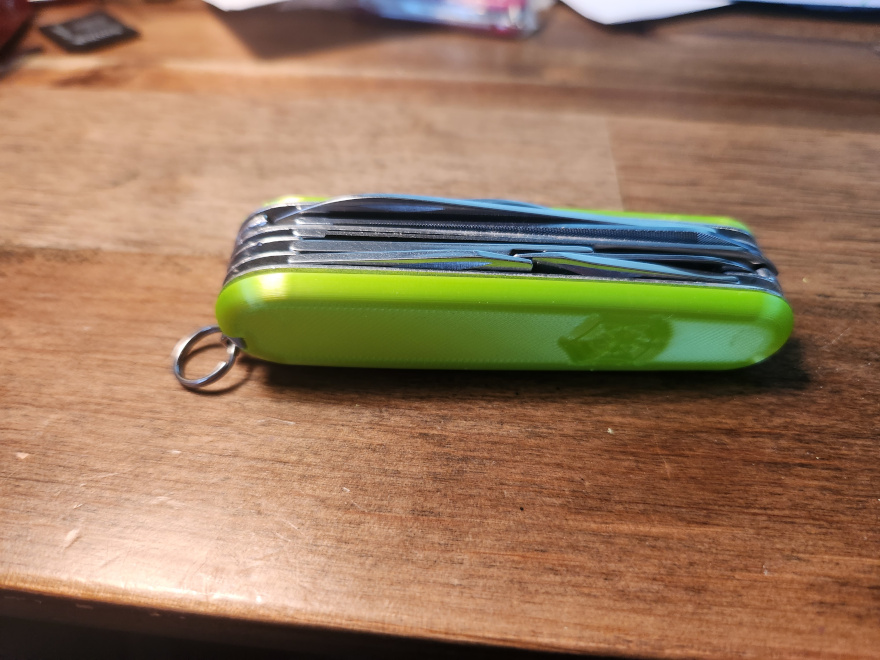
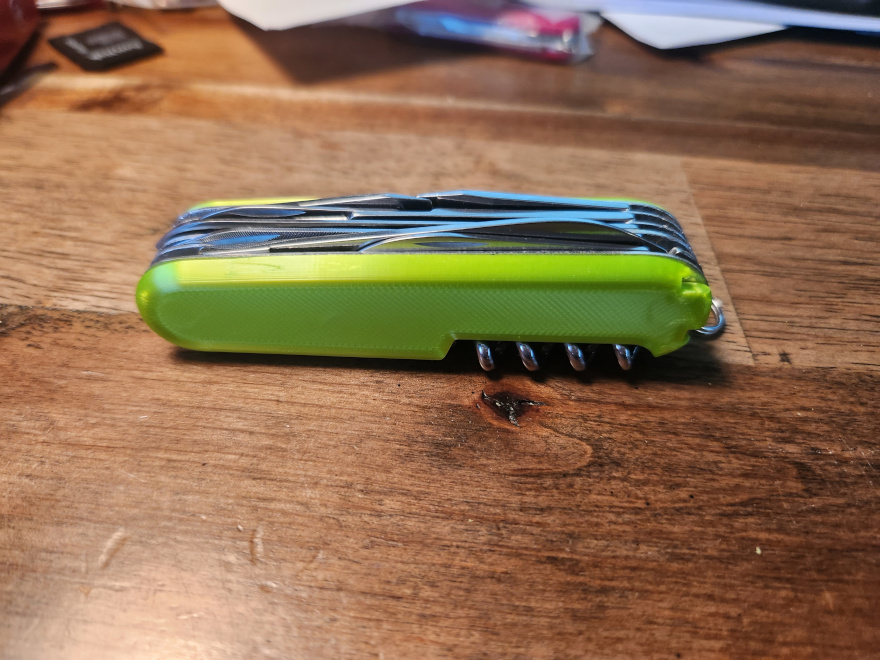
I have also 3D printed some SAK scales out of PLA. They've been doing pretty good for almost 2ys now.
-
@AzteCypher said:
I still have my old Ender3. I'm going to mod it with direct drive and make it my TPU printer as TPU needs to print slow anyways. I now have a Bambu X1C and it's awesome. I use Cura for my Ender3 and Bambu Studio for the X1C. I'm thinking of trying out Orca for both printers.Is that what mine is an older Ender-3? I just want to get it to work but mod it?
Pics posted back,,
JR -
You have an old Ender 3. In fact my first foray into 3D printing back in 2020 which I posted in here was mostly my experience and process of upgrading the printer during the COVID lockdown era. I did post a link to the old thread in this thread.
The Ender 3 is unlimited in what you could do with it from upgrading motherboards, extruders, etc...
With that said, the new Anycubic Kobra S1 combo is a total game changer compared to my upgraded Creality Ender 3s. Automatic bed leveling, flow rate, and vibration dampening are game changers. Being able to use multi colours in a unit that also has active drying capabilities is also great. Love that I can send prints via WIFI and view the print live via the built in camera is also advantageous. There are also sensors that will notify you and stop the print if anything wrong is noticed. There have been some big advances since 2020 in the printing field.
Do not get me wrong, the Ender 3 was a great printer that you could upgrade tremendously. I could never get the bed leveling sensor to work consistently on the one printer. Automatic bed leveling is a must today.
I found a print that was designed to improve the machine in multiple ways. This was one of the first things I did to upgrade the Ender 3.
<a href="https://flic.kr/p/2j2SK6D" target="_blank" rel="noopener noreferrer"><img src="https://live.staticflickr.com/65535/49904331443_4931b7561f_4k.jpg" alt="banner" style="max-width: 100%; height: auto;" /></a>IMG_8458A by Chako, on Flickr
After printing parts that improved the printer, I got serious and did a motherboard upgrade. This allowed improved speed and quiet operations.
<a href="https://flic.kr/p/2jnp6Sj" target="_blank" rel="noopener noreferrer"><img src="https://live.staticflickr.com/65535/50125268098_da15c5edd1_4k.jpg" alt="banner" style="max-width: 100%; height: auto;" /></a>IMG_8711A by Chako, on Flickr
Just to list a few things you can do to the Ender 3. There appears to be fewer ways to improve the Anycubic Kobra S1 other than the poop shut side tray and a riser I am printing right now to get the Ace Pro filament holder/dryer off of the top[ of the machine.
-
I’ll have to show this to the kid, cause I have no clue to any of this, a plumber/handyman knows the basics to just about anything, like carpentry, electric, concrete, even flooring, but electronics, the closest thing is t-stats, but everything’s programmed, we just run the wiring and set it, heck the wife even does that, it’s all done through her phone,,
JR -
@RobertMcc - What did you pick up?
@MadPlumbarian - I have a spare Ender 3 motherboard if that will help. I can send it your way as I don't need it.
-
I have no clue, I’ll have to ask the kid,,
JR -
@AzteCypher said:
@RobertMcc - What did you pick up?Just a starter printer. ENDER 3 v3 KE.




 I would have to upgrade to something more durable then PLA.



Hello! It looks like you're interested in this conversation, but you don't have an account yet.
Getting fed up of having to scroll through the same posts each visit? When you register for an account, you'll always come back to exactly where you were before, and choose to be notified of new replies (either via email, or push notification). You'll also be able to save bookmarks and upvote posts to show your appreciation to other community members.
With your input, this post could be even better 💗
Register Login





