
Hello Sailor! Marlin Spike/Rigging Knife Challenge - August 2026
-
Day 3

I was planning on sharing a pic from L.A. today, but our flight got cancelled and we won’t get in till later. Glad I made today a travel day with no expectations to accommodate travel disruptions. Anyway here is my travel pack. I have gone through three North Face Recon packs over the years. The first, got knifed open while on travel and was retired after a decade of use. My second went to my eldest son and he is still using it after five years and it still is going strong. This one is my latest. I did snake knot zipper pulls with titanium chord ends. I also did cobra weaves for the sinch straps
JonesE
-
<u>Day 3</u>
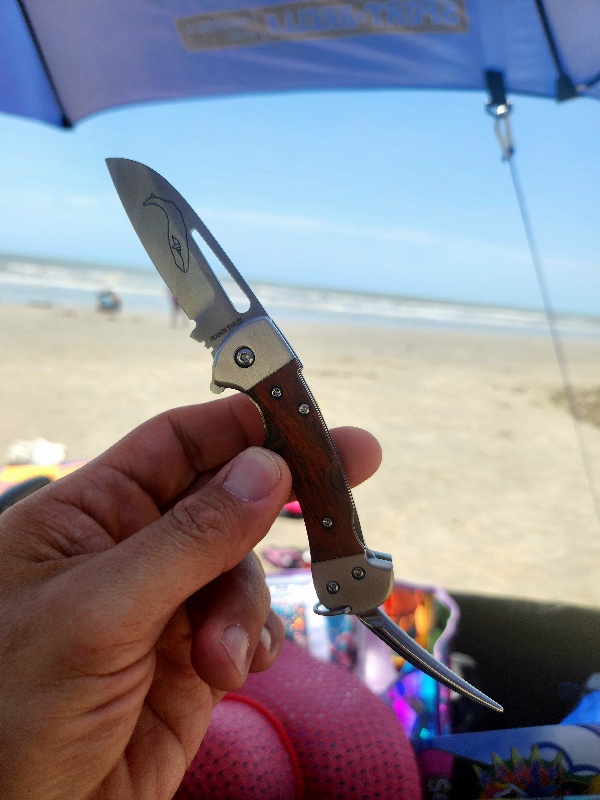
Making sure the Myerchin gets some R&R as well.
-
Day 3
Adding a lanyard to the Skipper
Orange paracord with a double snake knot and 2 celtic button knot beads.
I can never remember my knots so I always have to YT a tutorial for these. Usualy a random 'ranger bead/pave counter' video since both knots are standard for that project.
The spike came in handy for keeping things strait while tieing and later while dressing the beads for working loose loops out

-
@Noa Isumi said:
Day 3
Adding a lanyard to the Skipper
Orange paracord with a double snake knot and 2 celtic button knot beads.
I can never remember my knots so I always have to YT a tutorial for these. Usualy a random 'ranger bead/pave counter' video since both knots are standard for that project.
The spike came in handy for keeping things strait while tieing and later while dressing the beads for working loose loops outNice work and cool use.
Day 3
Prepping for a cruise. I think this loadout should cover most of the bases, and should get through security. Apparently there are aftermarket scales for the Companion w/ toothpick, tweezers, pin, and pen, just like Plus scales. Might have to look into those.
Tools:
- Ruler/file/flat driver
- Can/bottle opener
- Scissors
- Marlin spike
- Bit driver w/ #2 phillips

-
[day 3]
It helps to stay on course when reading in public.
[attach id=0 msg=2583519]

-
Day 4 of 30
Today used spike to poke holes on plastic just for fun, knife was used to tear boxes
[attach id=0 msg=2583543]

-
@AzteCypher said:
<u>Day 3</u>
Making sure the Myerchin gets some R&R as well.
I sure like the size of your Myerchin. All mine are like 4 - 4.5 inches.
-
@BPRoberts said:
Nice work and cool use.Day 3
Prepping for a cruise. I think this loadout should cover most of the bases, and should get through security. Apparently there are aftermarket scales for the Companion w/ toothpick, tweezers, pin, and pen, just like Plus scales. Might have to look into those.
Tools:
- Ruler/file/flat driver
- Can/bottle opener
- Scissors
- Marlin spike
- Bit driver w/ #2 phillips
A marlinspike for the Roxon? That's really cool.
-
Day 4
How about a Midshipman's Hitch around a marlin spike? (Technically, I tied the knot freehand and then slid it over, which is sometimes the easier way to use it.) I've been told this is the best general purpose friction hitch, though for most people's basic camping and yardwork applications I suspect two-half-hitches, a taut-line, etc. would be fine. None of them is particularly difficult, so might as well learn the "best" one. The standard use is to adjust the tension on a line to do something like tie off a guyline on a tent, but being able to make and change the size of a loop is really useful in general.
<u>Directions:</u>
-
Run your rope around whatever you're securing to (tent stake, dock, pole, etc.) The other end will attach to something that you are trying to tension (tarp, grommet, hammock, etc.)
-
Pass the working end (the one you're tying with) over the standing end (the other one), then forward, under, and into the loop.
-
Bring the working end up, over and out of the loop, take it in front of and under the standing end (still working on the outside of the loop)
-
Bring it back under and out of the loop. You should now have two wraps around the standing end inside the loop.
-
Go out and over the standing end (outside the loop) again. Wrap around and bring the working end through the 3rd (outside) wrap that you just made.
-
Pull tight and check.
<u>How to check:</u>
-
Does it slide? The purpose of this knot is to create an adjustable length loop, primarily to put more or less tension on a line. Slide the knot way from the anchor and the loop gets bigger "using" more rope. Slide it snug to the anchor and the loop gets smaller, reducing tension.
-
Visually, you should see 2 loops on the front of the rope, with your working end coming up between them, followed by a third loop on the back. The taut-line hitch (the most likely miss-tie) has the two inner loops together, with the working end outside.
Great video here:
https://www.youtube.com/watch?v=bMZtTUTg_mEAnd of course, the classic animated knots.

-
-
<u>Day 4</u>
I'm going to show the clove hitch as that's the first knot my dad taught me. He used it to tie down hogs when he was a kid. We'll pretend the spike is a hog's leg. :D
We'll start with creating a loop passing the cord under the beginning of the cord.
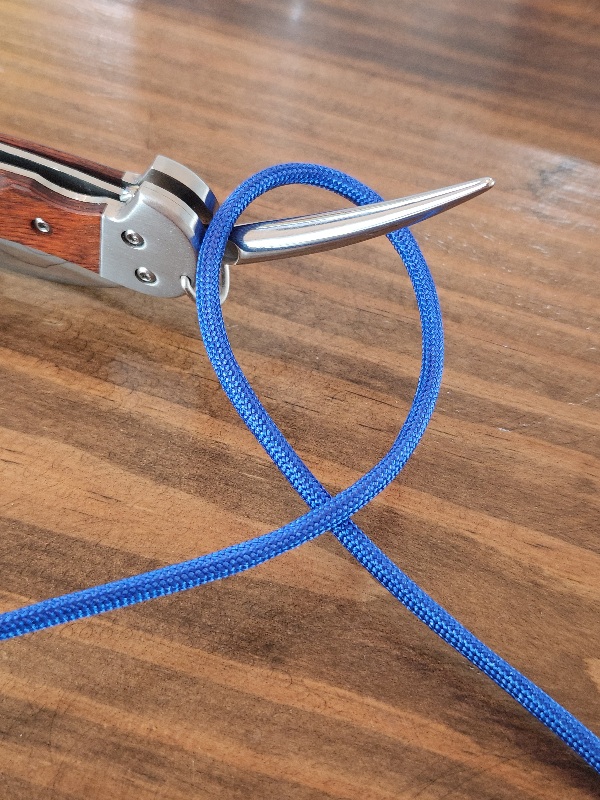
The we'll grab the loose end of cord and creating the same loop again making sure the loose end passes underneath the cord.
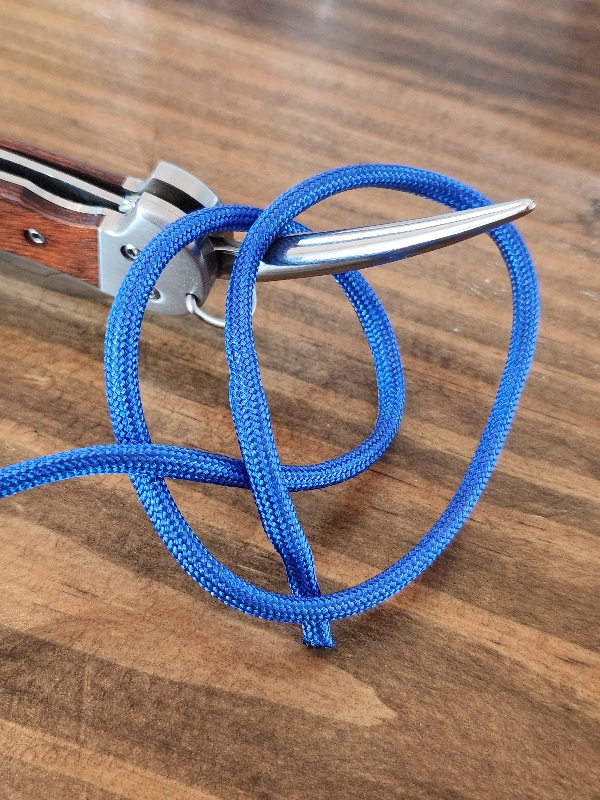
Then you pull both ends tight.
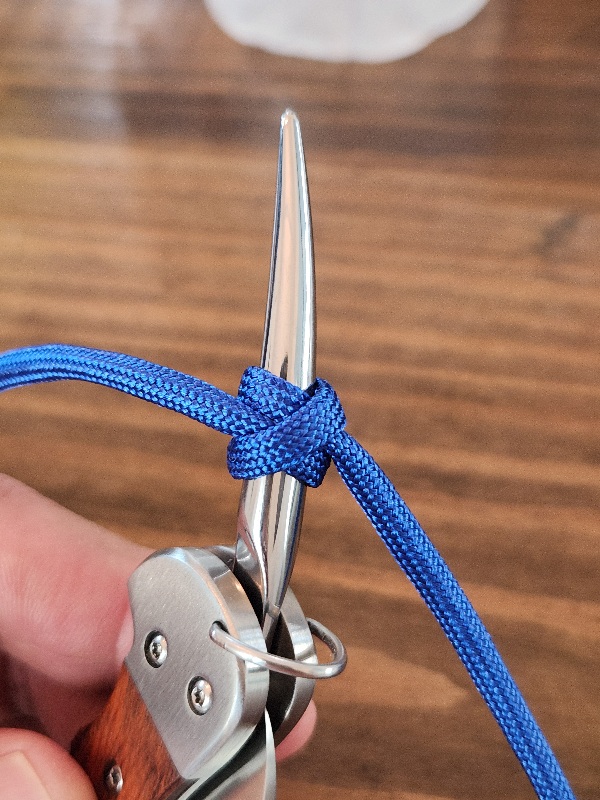
Thanks for coming to my mini-Ted talk. :D







Hello! It looks like you're interested in this conversation, but you don't have an account yet.
Getting fed up of having to scroll through the same posts each visit? When you register for an account, you'll always come back to exactly where you were before, and choose to be notified of new replies (either via email, or push notification). You'll also be able to save bookmarks and upvote posts to show your appreciation to other community members.
With your input, this post could be even better 💗
Register Login


