
And so it begins.... (My adventures into Alox!)
-
I'm thinking maybe grind a pair of the opener layer springs down thinner and use them side by side like the saw springs for the pliers. They'll operate in unison for the Phillips and independently for the 2 tools on the other end.
Springs and scales are on the way to you now as well as 3 of the long Phillips that you use for the 84mm. A few more sets of Alox scales will follow shortly. I now need a set of blue HA scales for Waterlander if you have them. I could really go for any HA scales you can spare in any color. I'm cutting some titanium 84mm scales so if you want to give them a try I can send you a pair with the Alox.
Ya it would be a good use for 2 opener springs too, since I have those in abundance.
I will be anxiously watching the mail box for the package of goodies believe me! Blue HA will be the next run for sure, I'm all out.
I love anything Ti now... and in the 84 size it would certainly add some strength to the smaller frame.
Cool. I'll cut you a few blanks out of 1/16" ti while I'm at it this weekend and send you a few pairs with all the Alox scales I'll have for you. I guess you can profile up to the scribe line yourself since you have the same sander I use.
-
What thickness do you guys use for the TI scales? I'll keep my eye open at work to see if I can get any bits left from jobs.
If it's flat sheets we can use anything from .025" up to .125". I buy scrap wherever I can find it so if you can find decent sized pieces I'd be happy to buy or trade you for it.
Ya weren't you making use of odd little parts for jewelry too? Like the cut parts between scales? Might as well get the max value out of a piece of Ti.
Oh I'm up to my neck in tiny jewelry sized pieces but I'll always be able to make use of anything bigger than a Dorito. I'm shooting a titanium cutting video this weekend to show how it's done with the jewelers saw so after you sand the profile on the 84s maybe you'll want to try cutting them out? Then you can make anything.
I'd like to do a video series on the whole process start to finish for those that want to try and those that want to buy.
Oh that would be awesome! My issue when I tried was that the area I was cutting would get so hot it would start to smoke.. even going slow. So clearly I needed a better coolant along the cut line or something. I was breaking a blade every quarter inch.
-
I'm thinking maybe grind a pair of the opener layer springs down thinner and use them side by side like the saw springs for the pliers. They'll operate in unison for the Phillips and independently for the 2 tools on the other end.
Springs and scales are on the way to you now as well as 3 of the long Phillips that you use for the 84mm. A few more sets of Alox scales will follow shortly. I now need a set of blue HA scales for Waterlander if you have them. I could really go for any HA scales you can spare in any color. I'm cutting some titanium 84mm scales so if you want to give them a try I can send you a pair with the Alox.
Ya it would be a good use for 2 opener springs too, since I have those in abundance.
I will be anxiously watching the mail box for the package of goodies believe me! Blue HA will be the next run for sure, I'm all out.
I love anything Ti now... and in the 84 size it would certainly add some strength to the smaller frame.
Cool. I'll cut you a few blanks out of 1/16" ti while I'm at it this weekend and send you a few pairs with all the Alox scales I'll have for you. I guess you can profile up to the scribe line yourself since you have the same sander I use.
I just used a file only no power tools to profile that 93 set of Ti scales. I took 2x half inch diameter rods about 6 inches long and drilled and tapped them. Then screwed one to each end of a scale and mounted in a vice. Worked great as a way to hold the scale solid and allow 360 degree access to the part at any angle.
It took awhile, but I think the next time it'll go faster.
-
@bushidomosquito said:
If it's flat sheets we can use anything from .025" up to .125". I buy scrap wherever I can find it so if you can find decent sized pieces I'd be happy to buy or trade you for it.Ok, I'll keep my eye open for ya. Next time we send some to the sheet metal shop for work, I'll try and go up and see the guys and ask them to save any left over bits for me.
-
@Syph007 said:
I just used a file only no power tools to profile that 93 set of Ti scales. I took 2x half inch diameter rods about 6 inches long and drilled and tapped them. Then screwed one to each end of a scale and mounted in a vice. Worked great as a way to hold the scale solid and allow 360 degree access to the part at any angle.It took awhile, but I think the next time it'll go faster.
Yes, you passed that test Padawan, but that's rounding the edges. By "profiling" I mean taking a scale that's just been rough cut out of the sheet with the saw and sanding it right up to the scribe line so it matches the profile of a stock scale. Less work for me, more practice for you. (Hint: Epoxy 2 scales together before you profile and drill them.)
-
I just used a file only no power tools to profile that 93 set of Ti scales. I took 2x half inch diameter rods about 6 inches long and drilled and tapped them. Then screwed one to each end of a scale and mounted in a vice. Worked great as a way to hold the scale solid and allow 360 degree access to the part at any angle.
It took awhile, but I think the next time it'll go faster.
Ah... gotcha! Ya all the shapes Ive made so far have been copies of other shapes and the router trick has seen to getting them exact.
Yes, you passed that test Padawan, but that's rounding the edges. By "profiling" I mean taking a scale that's just been rough cut out of the sheet with the saw and sanding it right up to the scribe line so it matches the profile of a stock scale. Less work for me, more practice for you. (Hint: Epoxy 2 scales together before you profile and drill them.)
-
I thought I write down some key things for people that also want to try this mod.
-
Make sure to be extremely careful when removing the pins. Triple check if your punch and first thin drill spot is centered. It will save you a lot of hassle time and scales (at least undamaged ones ;))
-
The pivots must go into the scales. Otherwise the backsprings don't have enough tension to make everything snappy. I had the problem that mine were almost to short which causes the spring next to scale that doesn't see the pivot to not operate like intented. It lacks some punch. You can live with it, but it's just not the same like on a brand new one with pins.
-
When drilling out the center holes of the springs, make sure to stay as centered as possible. It's not just that the leftover material around the pivot hole is pretty thin when drilled to 3mm, but also the position of the spring might change, which make it lose tension when assembled.
-
-
Yep good tips for sure. I did 1 and 2 in your list and learned. If the pivots dont get inside the scales you end up with a sad floppy SAK with no snap at all. I still use hart burs for removing pins and havent had any issue wrecking scales since I moved to using those.
I never had an off center hold in a spring though, but thats why I dont recommend people use a milling bit to drill with. I like a pointed self centering bit and not clamping the work so its free to self center as I drill. ;)
-
Are the Phillips drivers on the Lite models (e.g. Spartan Lite) the same as the ones on Explorers? I found a Spartan Lite on eBay with incredibly ugly scales. I hope this will stay low on the bidding count. :D
Are Phillips drivers working well with stock caplifter/can opener springs? Do they need grinding? How about the mid-position lock?
-
The lite models should all have the modern philips (i think) which is the on you want. The older style (that is paired with old mag glass on explorers) is not what you want, it wont fit without moving the pivot and lots of heavy modding.
The philips is too wide for an opener layer spring, so you can do what I did and use a blade layer spring, or thin down the philips to work with the opener layer spring but then I don't think that layer would fit against a scale, youd have to put in near the middle, which probably would work better anyhow. The best way to explain how to shape the pivot part to fit, is.. whatever spring you end up using, shape it to match whatever part normally goes with that spring. So if you replace the can opener for a philips, match the shape of the can opener pivot area. Scribe and grind and sand and polish. Thats it! :D
-
I have a spartan lite and it is the small inline :)
-
@crackout said:
Blade spring from a non-Solo knife, I guess.
Mh... blade springs are the least expendables. :-X
Let's see. :)Exactly.. and then you think man I have to waste a pioneer just for the spring... think a few more moves ahead in this chess game and you'll arrive where I did... it makes sense to make up springs. :D
-
@crackout said:
So you grind down your custom scissors springs or do you have an extra design?You could still get these one layer Pioneers (the Pioneer Pruner is actually still being produced) and use the blade as a replacement (pivot assembly assumed).
Yup I made my custom spring to have extra metal so I can grind down to use how I need it.
Pruner would work great. I thought it was discontinued too though along with solo/rancher/harvester.
I loved this SAK but it was a for hire job so it's long gone... I need to make another for myself.

-
So both retain their mod position snap in this example? And also with a blade spring?
Both the Solo and the Pruner are still listed on the site. Not sure if that's a 'yes' for still part of the line-up though. I can still order them both at Amazon no problem.
-
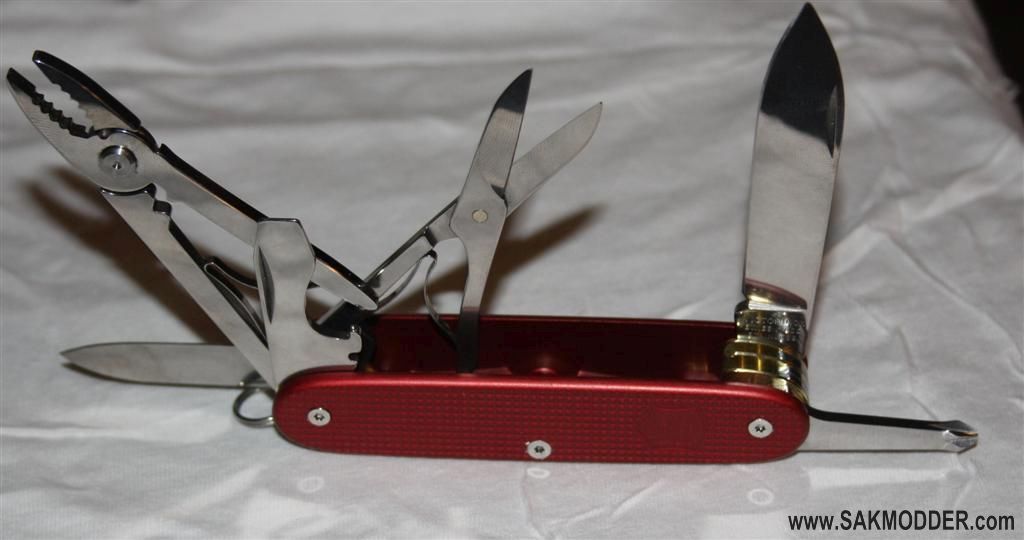
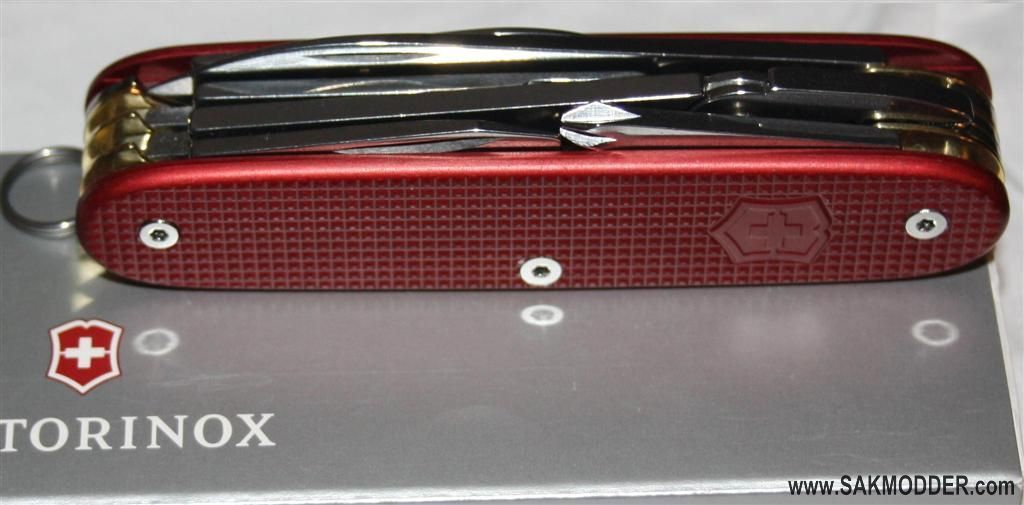
Finally got this sucker done... urban pioneer jr! Pioneer Cadet with scissors...

Red hard anodize with brass liners. The keyring had to go to make room for the awl and I made a custom piece in brass to take it's place.


Here is what the awl modification looks like.


-

I wish I had some money to spend :( This thing looks just dreamy.


Hello! It looks like you're interested in this conversation, but you don't have an account yet.
Getting fed up of having to scroll through the same posts each visit? When you register for an account, you'll always come back to exactly where you were before, and choose to be notified of new replies (either via email, or push notification). You'll also be able to save bookmarks and upvote posts to show your appreciation to other community members.
With your input, this post could be even better 💗
Register Login


