Wenger Scissors and Saw into Vic 84mm frame. Pic HEAVY.
-
-
-
-
I've just done a hands on side-by-side comparison with a pair of new condition Vic' cellidor scales and the CF is a little more grippy than unworn standard scales.
Kind of like the difference between running your finger along Perspex (acrylic) and Lexan (polycarbonate). they are both smooth, but your finger glides along one and drags a little on the other.
-
-
-
thank you.
and thank you for this thread. I will be attempting this when work slows down a little.
have the donor knives, just need to sand down some pin stock
I'll be attempting to make an awl/file combo like i saw a modder do
probably try it on the wenger file first just in case something goes wrong.
-
ah, I thought you meant the big metalsaw/file...if you are meaning the nail-file in place of the small blade, yes I have fitted then to Vic' knives. they need a very slight amount of material removed from the back end of the tang where the blade sits in the closed position to make the blade sit a little higher so the nail nick is accessible.
Go very slowly with a fine stone and check often, it only takes a fraction of a mm at the back of the tang to lift the tip of the blade several mm. -
-
Looks rather spiffy. When you taking orders?

-
The carbon seems to be standing up to use very well. The only "problem" with this knife is that the saw I used is very blunt and almost useless. It didn't worry me at the time as it was a prototype "proof of concept" build but now I might have to try and sharpen it up with my jewelers files.
I just recently bought a sheet of the 1mm carbon and I might pull this apart and do carbon liners for it too.
-
Thanks for this guide. Since I couldn't bring myself to break apart a 84mm Golfer to get the scissors layer, I decided to try this Wenger method instead.
I think the effort was pretty successful. I give you the Faux-Voyageur:
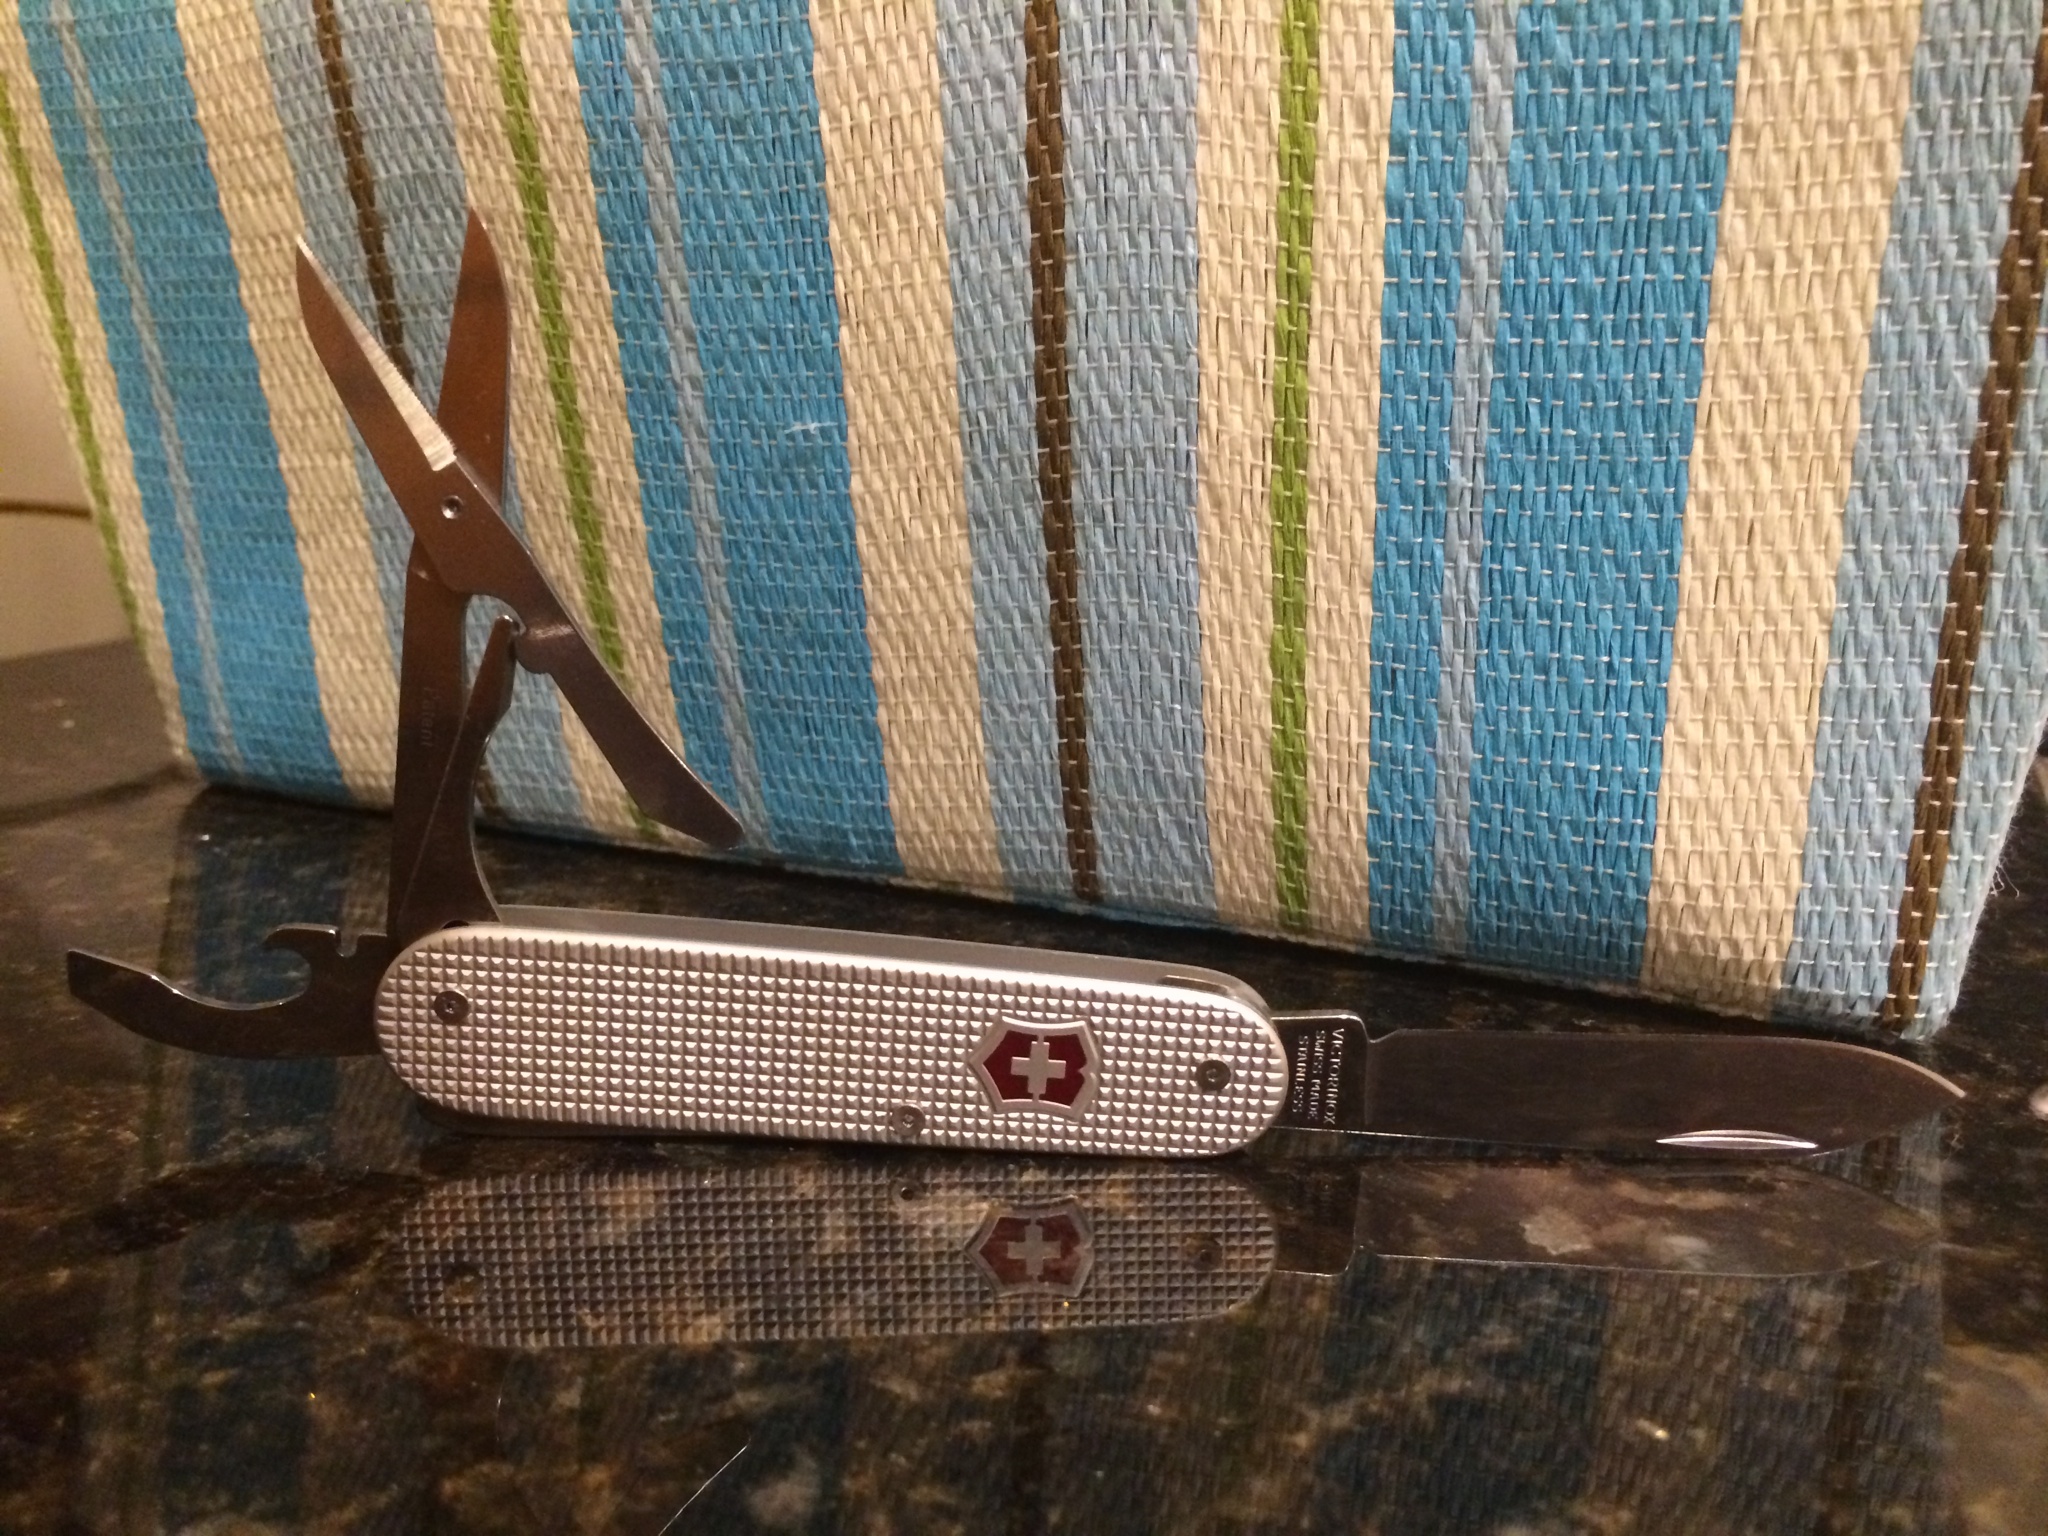
I made custom 2.25mm pivots by grinding down some brass rod to 2.25mm and then drilling and tapping for a 0-80 screw. I used 3/16" flat head 0-80 stainless screws. My pivots were a little too long-- originally I made them 7.25mm long but when I do this again, I'll make them 7mm or a little less.
Instead of grinding other tools down to make the rest for the scissors, I milled a custom one from aluminum. I also modeled the scale and liner in STL format. They're derived from scanning on a flatbed scanner, so they're not perfect-- but they're decent. I deburred and filed a little to get the fit that I wanted, but it didn't take much.
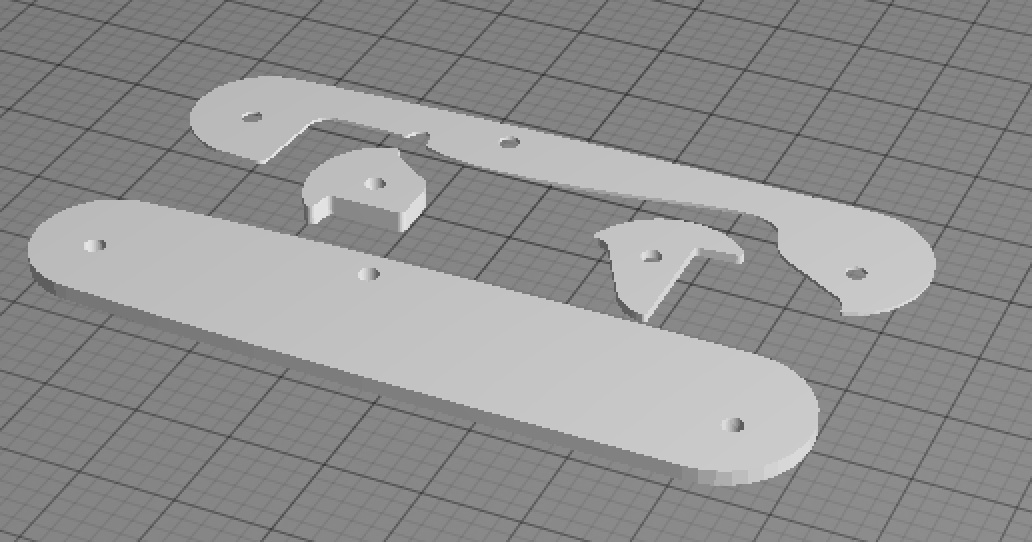
I posted these STLs to github in case they will come in handy to someone else: https://github.com/jake-b/84mm-Victorinox
The only issue is that the pad of the original victorinox back spring is a little too big by 0.5mm-0.7mm or so. Hence, the back spring sticks out just a tad when closed. I don't really know how to solve this yet-- I guess the face of the back spring needs to be ground down but I don't know how that will affect "snap" and I don't think doing it by hand with a bench grinder is a good idea. Also I added an extra 0.1mm brass washer in between the scissors and the scale, and I don't think its necessary, so next time its apart, I'm going to take it out as it makes the end a little to thick. Both problems are not terrible, so I'm going to start carrying the knife anyway.
Anyhow, thanks to everyone on this forum for giving me the ambition to try this modding thing for myself-- and to all the individual authors for posting great pictures and how-to's.
I still like the Victorinox scissors better, so I might try the 91mm-in-an-84mm mod next. I'll still need some 84mm scissors broken out to use as a template I think. While the "micro-serrated" Wenger scissors are cool, I like that both halves of the Victorinox scissors don't move when being operated.
-
Nice work. and welcome to the forum
The CAD models could be useful too.
As far as the spring goes, you can file the back (outside) of the spring at the end there without it effecting the snap very much at all.
I would stay away from filing the inside as it will effect snap and possibly the open/closed position of the scissors. -
Great work! Yep you can shave off some of the back of the backspring no problem and you wont notice loss of snap. I use a belt grinder and its pretty quick about removing material.
The 91mm scissors to 84mm works out really well actually, its just more work to get them to fit, but they function well.
-
Thanks for the kind words. I really like the 84mm size and will probably play with some more modding.
I had considered getting some brass liners cut for this project, but in one-off quantities its too expensive. (I didn't want to do it by hand) Similarly, I'd love to get some hard anodized color going on, but stripping and finding and anodizing company scared me off. Silver is fine for now. Baby steps.
I hate to file down the back and lose the "factory shape" and polish of the outside of the spring, but I guess that's the "right way" to do it. I had thought that it might be okay to file down the inside pad-- that there might be a little too much snap on the scissors since the Wenger scissor's "cam" is a little wider than the cam on other 84mm Vic tools. I appreciate the advise and I'll gather up some courage to start filing the outside.
I think I might reverse the layers next time I take it apart. The nail nick for the scissors might work better on the outside. The combo tools sit higher, and are more easily grabbed than the scissors. Maybe the scissors reset needs to hold the scissors just a touch further out.
-
A few pictures of the assembly-- in case it helps someone. Of main interest can see the custom milled spacers/rests and the 2.25mm custom pivots. I imagine the spacers/rests could be easily 3D printed at a service if someone wanted to replicate this knife.


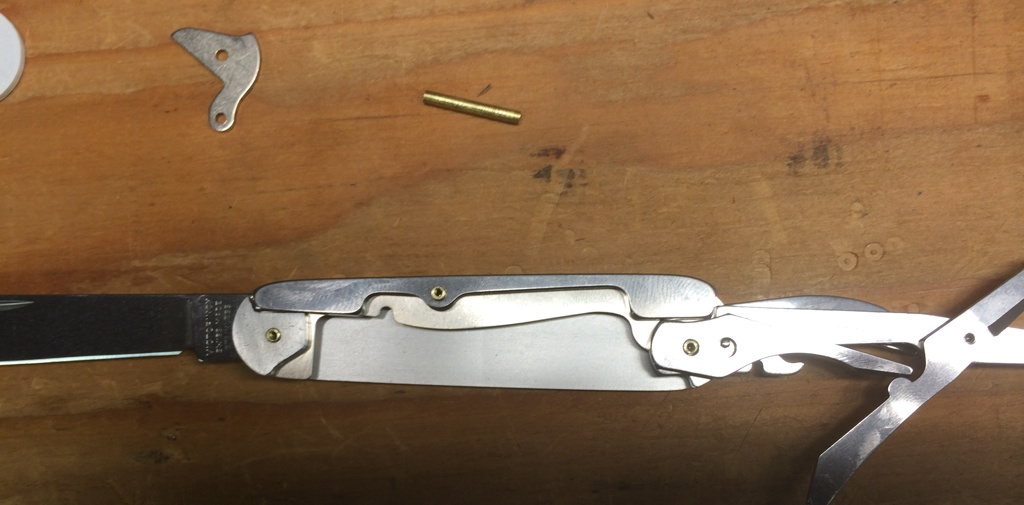
Still more work to do on the back spring.
-
@Jake said:
A few pictures of the assembly-- in case it helps someone. Of main interest can see the custom milled spacers/rests and the 2.25mm custom pivots. I imagine the spacers/rests could be easily 3D printed at a service if someone wanted to replicate this knife.
Still more work to do on the back spring.
That is tremendous. The custom pivots are brilliant. If you have an extra and don't mind to sell them I would like to buy from you.
-
-
One last follow up. I had an extra back spring and decided to try grinding the inside face of the back spring. By my estimate I needed to remove about 0.5mm to get the spring to sit flush. I know a bunch of more experienced folks recommend grinding the outside to shape, but that was harder to do right, and I wanted to see how the snap was affected by using this method.
I strapped the back spring in the mill and used an indicator to insure the face in question was parallel with the axis. I also masked the mill in plastic to keep the abrasives off the ways. I took 0.001" passes with a dremel grinding attachment. In the end, I did about 30 passes, closer to 0.75mm, but I stopped and did test fits after every 10 passes. The grinding wheel itself is consumed, so its not like an end mill where you know exactly how much you're removing.
Snap is still good-- maybe not as firm as before, but it does't feel bad. I was thinking that I might need to try bending the back spring a little to give it a little more force, but I don't think I need to try that. If I made another knife, I would do it this way again I think.
In the end, the fit when closed is good... maybe not perfect, but I didn't want to remove any more material.


-
Been a long time since this topic has been updated but It thought I’d add my recent experience to it.
Like many I have wanted an 84 with scissors but couldn’t really justify the prices you need to fork out for a vintage Vic even if I could get one here in the UK.
I have also had a red alox 84 that started out as a bantam but that was way to thin for me to like so I added a saw to make a lumberjack…much better.
However, I just couldn’t leave it there and after reading through this thread on several occasions I decided to sacrifice my evo18 and take the plunge.
Evo18 came apart, lumberjack came apart, and a sportsman came apart. know for the cost of those three I could have probably bought a vintage knife with scissors but I had these already so no additional outlay required :0)
The goal was essentially an alox evo18 or a huntsman with a file or a farmcadet x - whatever you want to call it.
As has been mentioned it went together remarkably easily. I did have a very broken 2.4mm blade so I made the spacer from that for an exact fit and I did grind down the pad of the spring to get it to fit flush on the scissors layer as described earlier - everything else just works as you would expect.
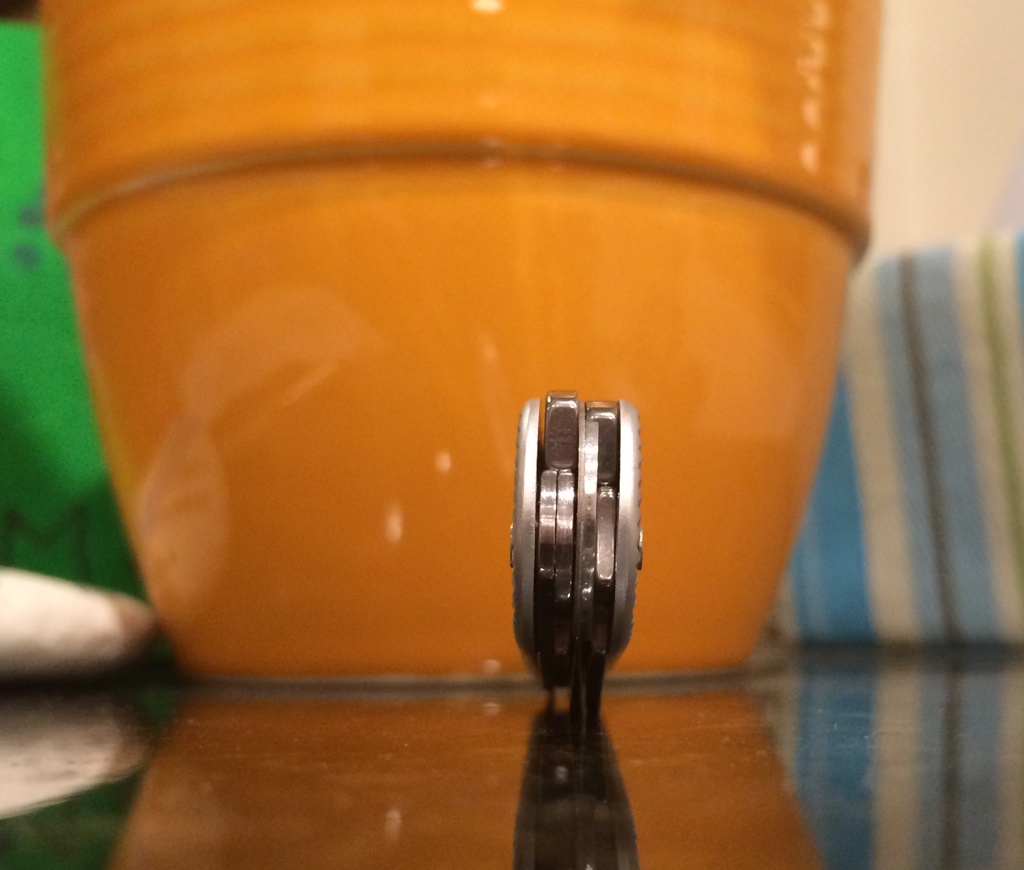
Although it is really a huntsman or evo 18 with less tools it is way cooler than either in the end I think and remarkably although quite a bit heavier it is only 1.75mm thicker than my economy recruit! 15.3mm vs 13.65mm.
Thanks for the inspiration. I think this is a absolute no brainier if you can put up with the Wenger scissors and have donors around already - not sure I would do it if I didn’t though as the expense would be quite huge!




Hello! It looks like you're interested in this conversation, but you don't have an account yet.
Getting fed up of having to scroll through the same posts each visit? When you register for an account, you'll always come back to exactly where you were before, and choose to be notified of new replies (either via email, or push notification). You'll also be able to save bookmarks and upvote posts to show your appreciation to other community members.
With your input, this post could be even better 💗
Register Login